Tusken Warrior pt 4 – Overskirt

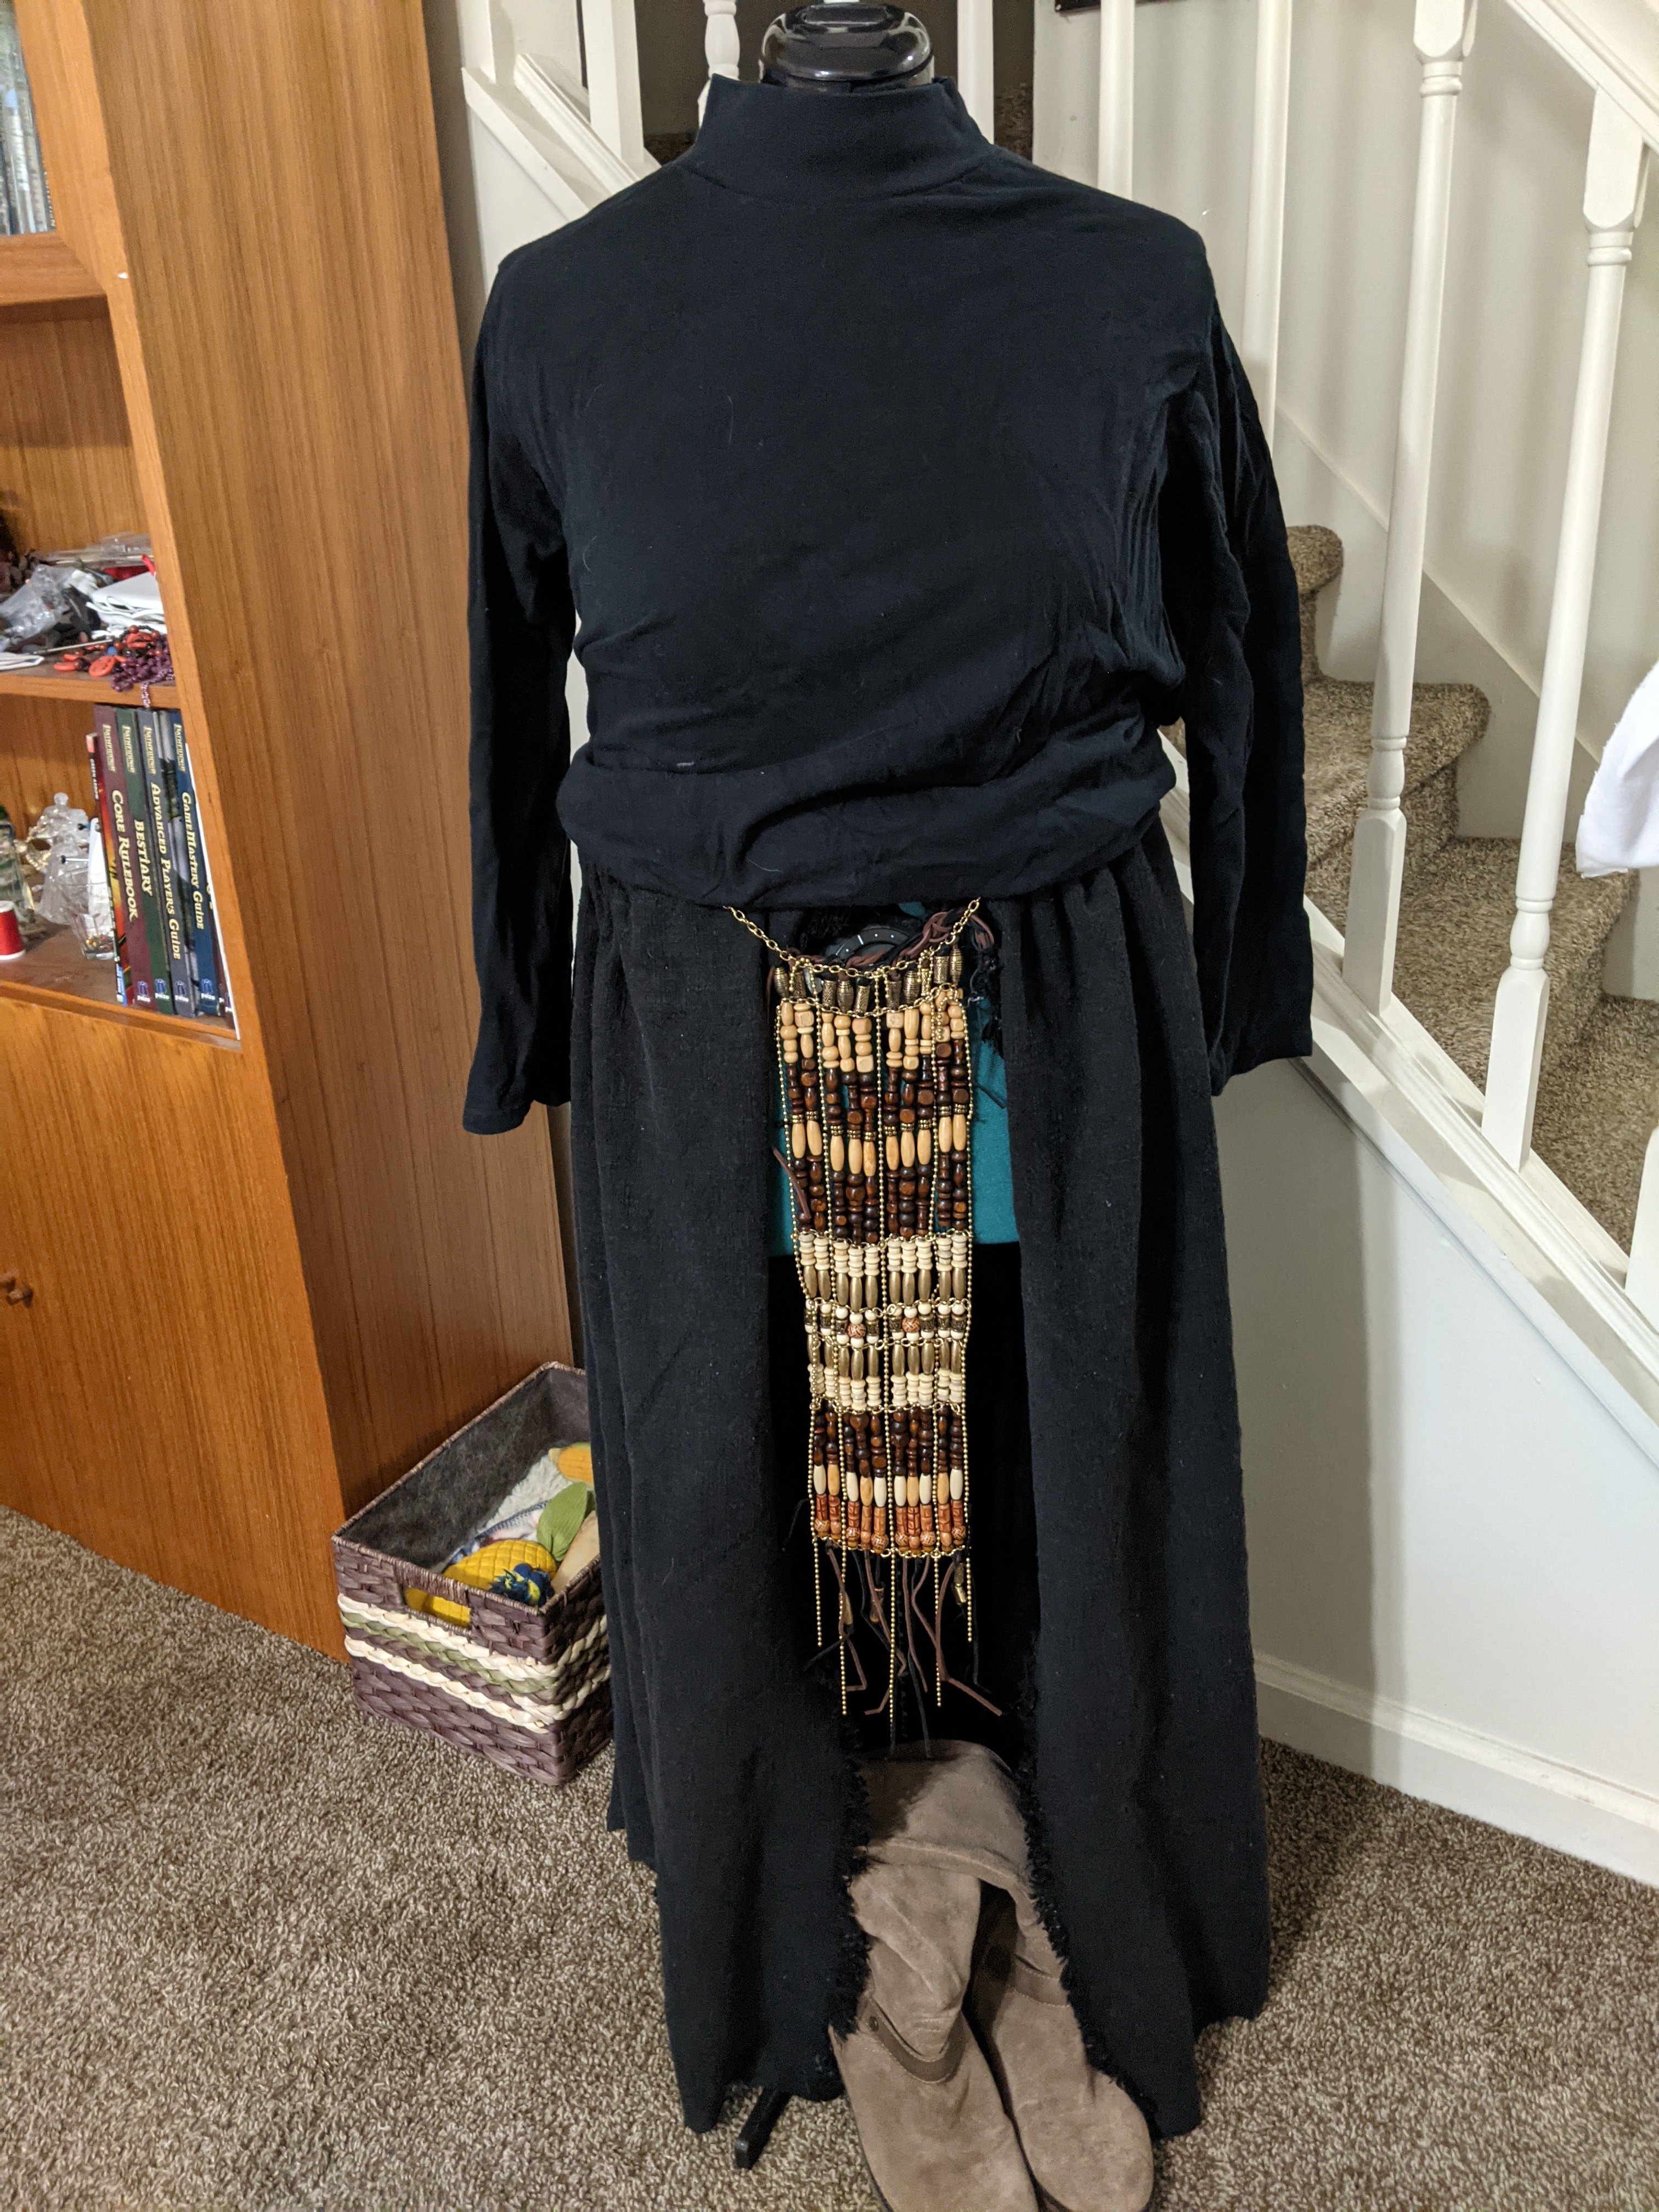
With vacation over and the beaded apron mostly complete, I can take a step back somewhat and focus on what I know best – actually sewing. I figured I’d work my way from the steps I believe might be the easiest to those that might take the longest. So because of that, we begin with the overskirt.

I’ve done a *little* bit of weathering … just enough to begin breaking down the harshness of the fibers and start making it a lot softer. Please note that I’ve *never* weathered anything for cosplay or costuming purposes before and by the end of this post you’ll see that that’s what I have to do next for pretty much every step. So I can’t delay it anymore, and that’s what my next entry will be about.

For now though, it’s the comfort zone for me.

Our Tusken Warrior here has an overskirt that wraps most of the way around her body and opens in the front to show off her pants.

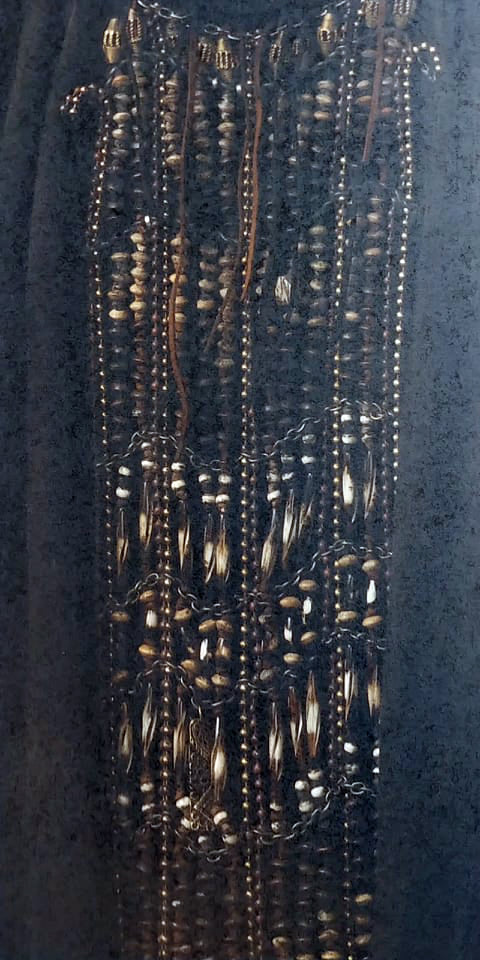
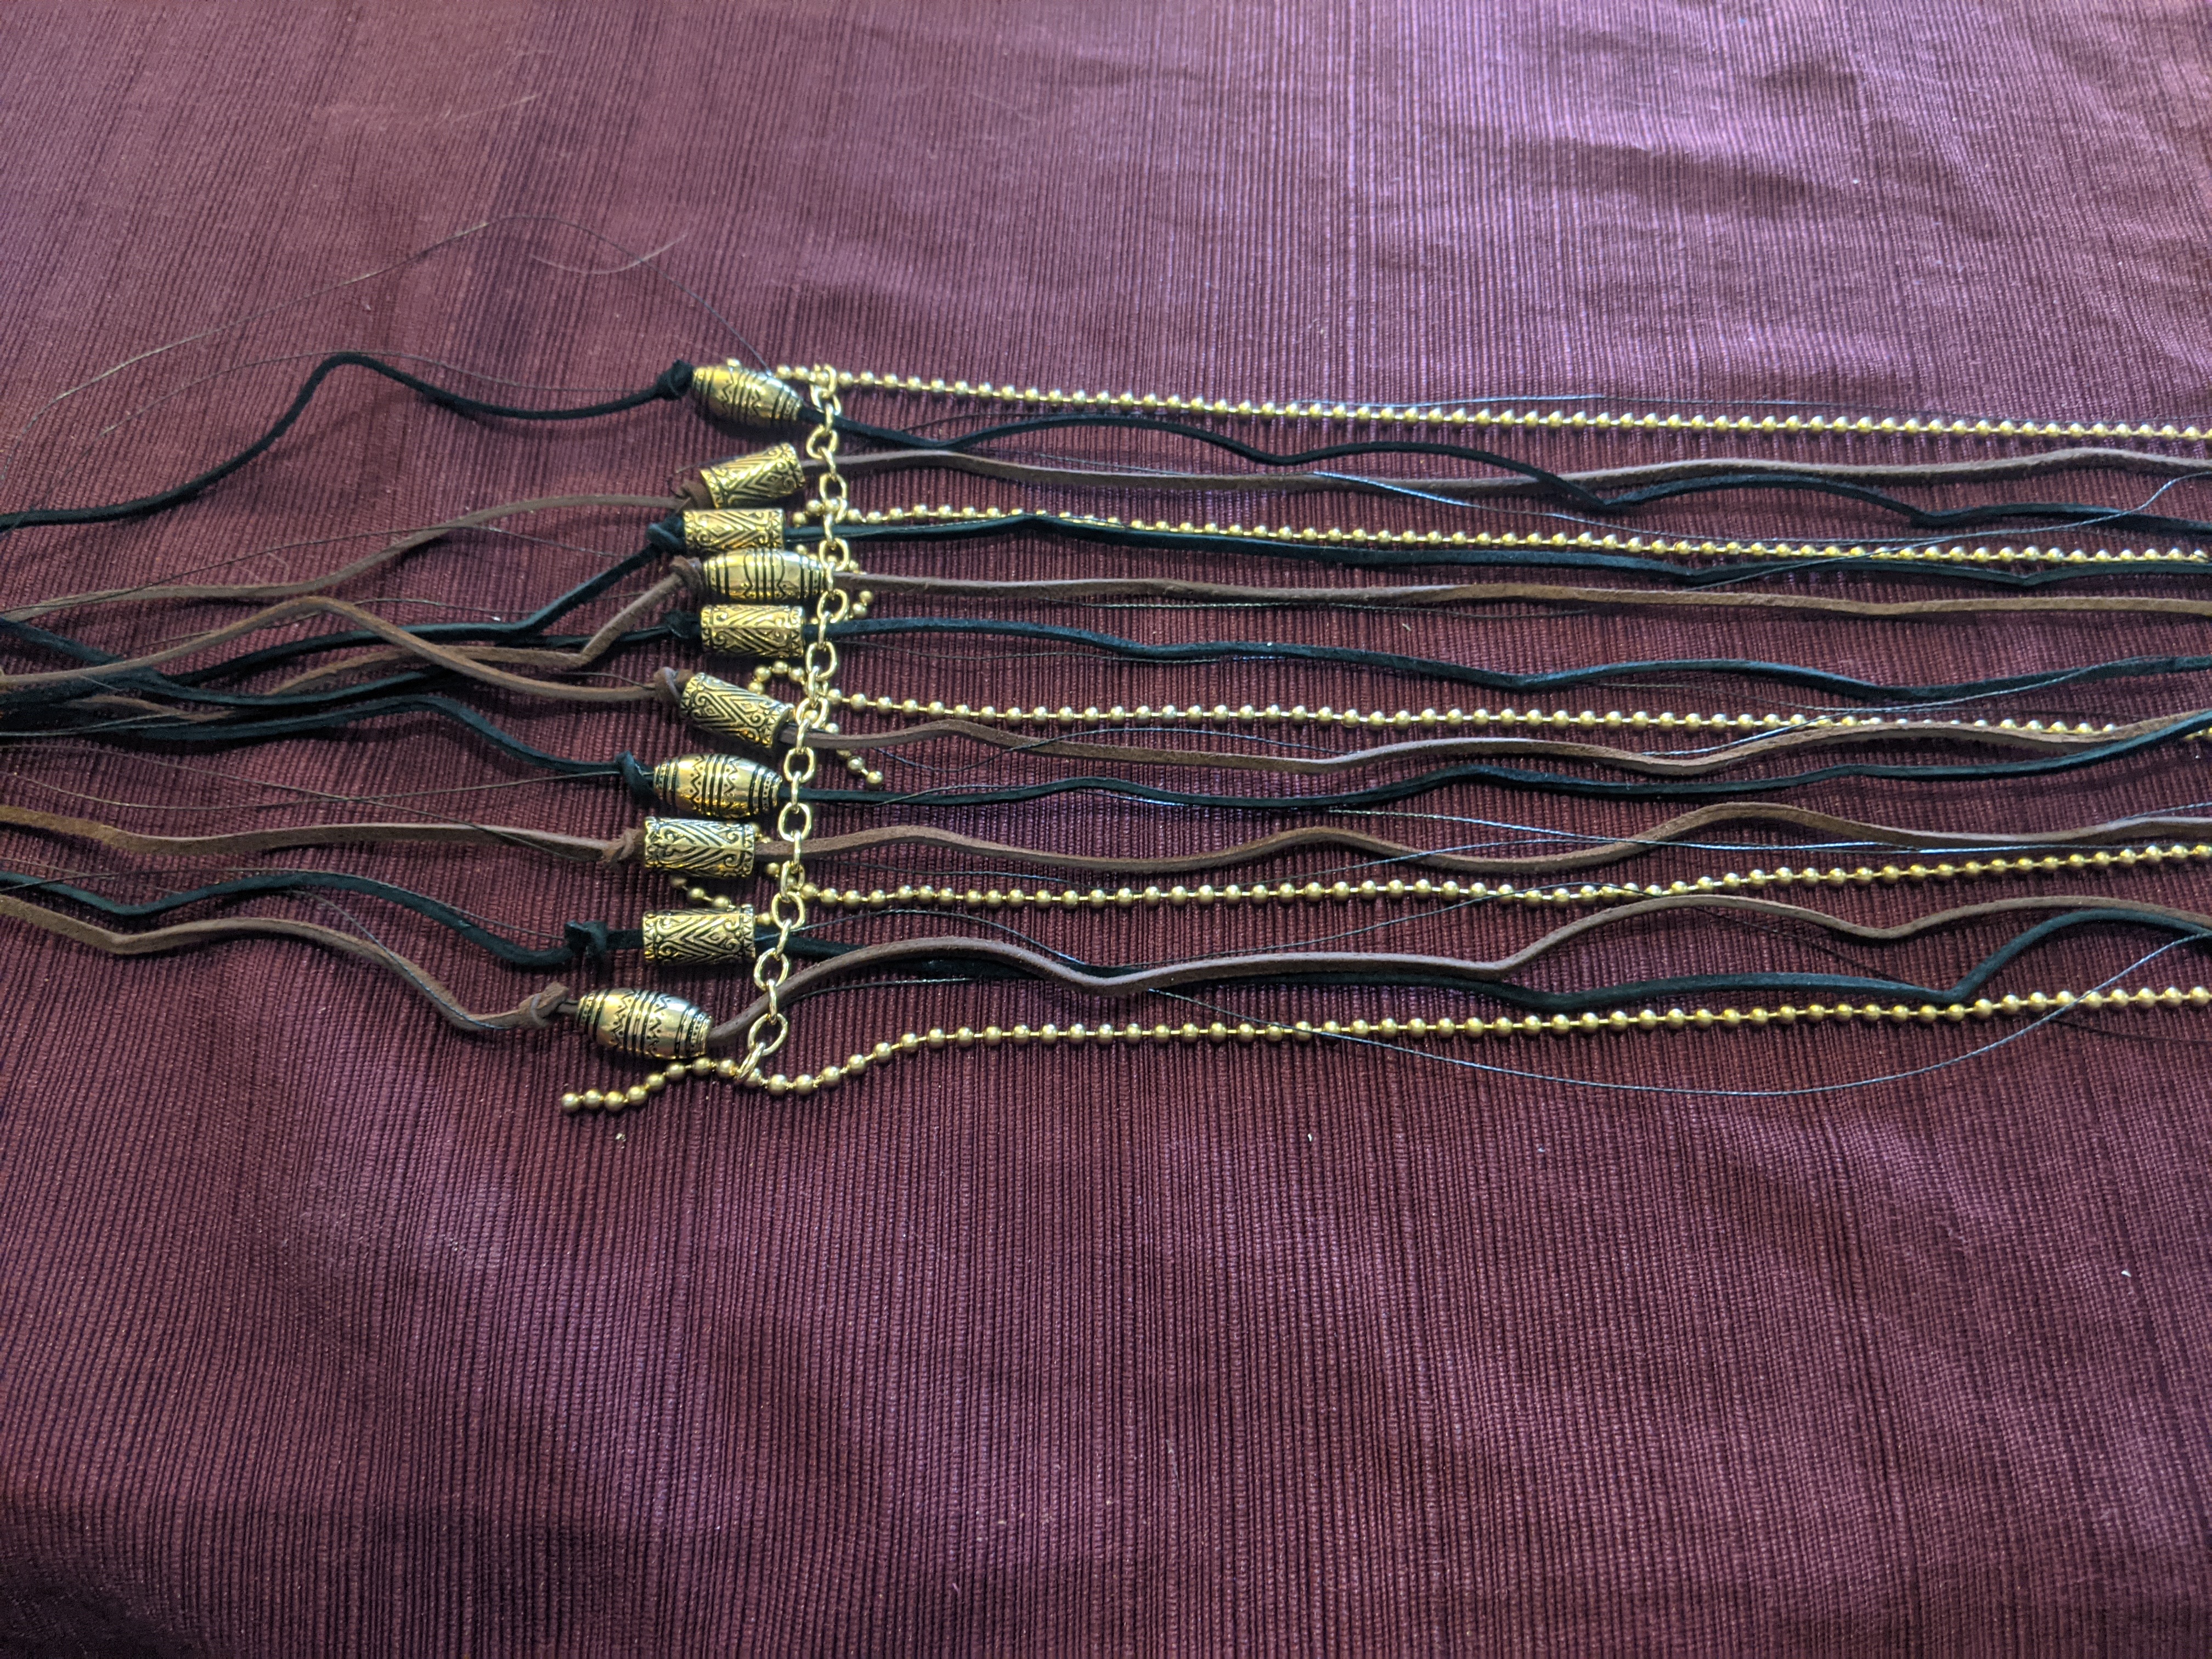
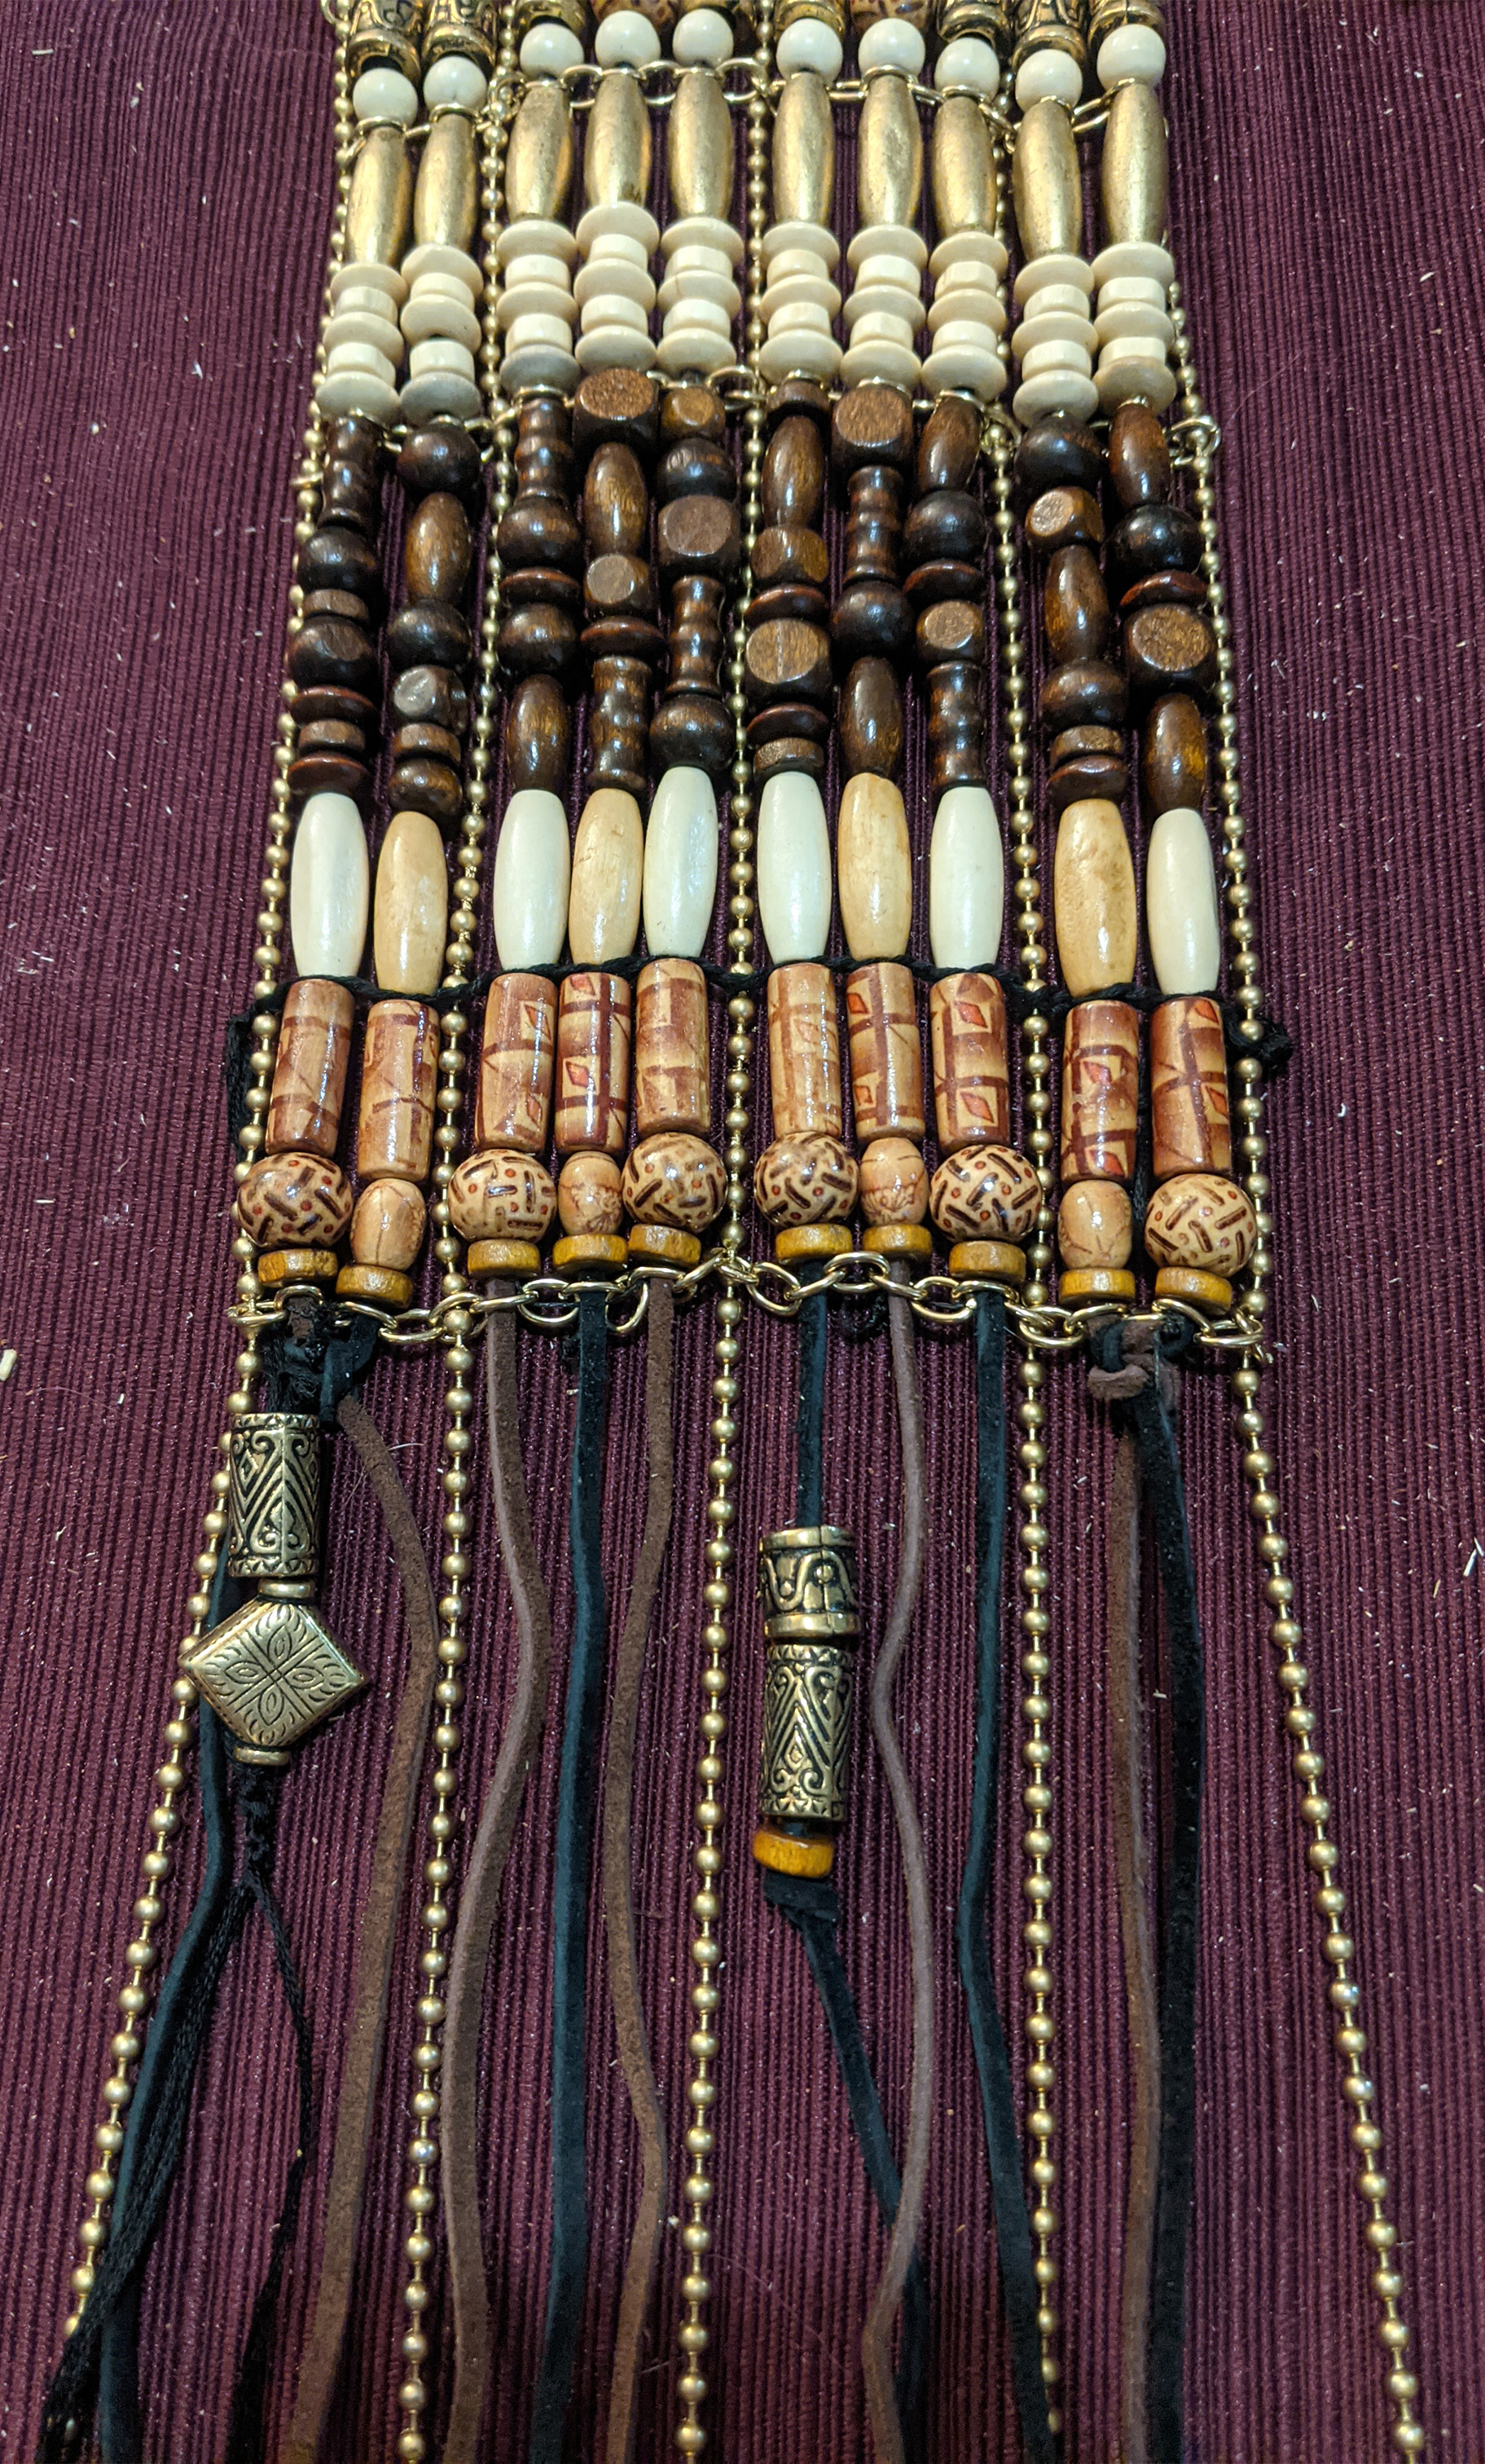
Sidenote, this is also a great shot of where the apron should fall! Just at the boot top. I also appreciate that you can see the apron’s vertical asymmetry in this angle. Now that I have my own apron hanging on my dress form, I’ve been second guessing whether or not I should have added a second row of darker beads toward the bottom (just above the red painted row). But this photo is a good reassurance that …. no, her’s is exactly the same, it doesn’t have to be perfectly symmetrical.

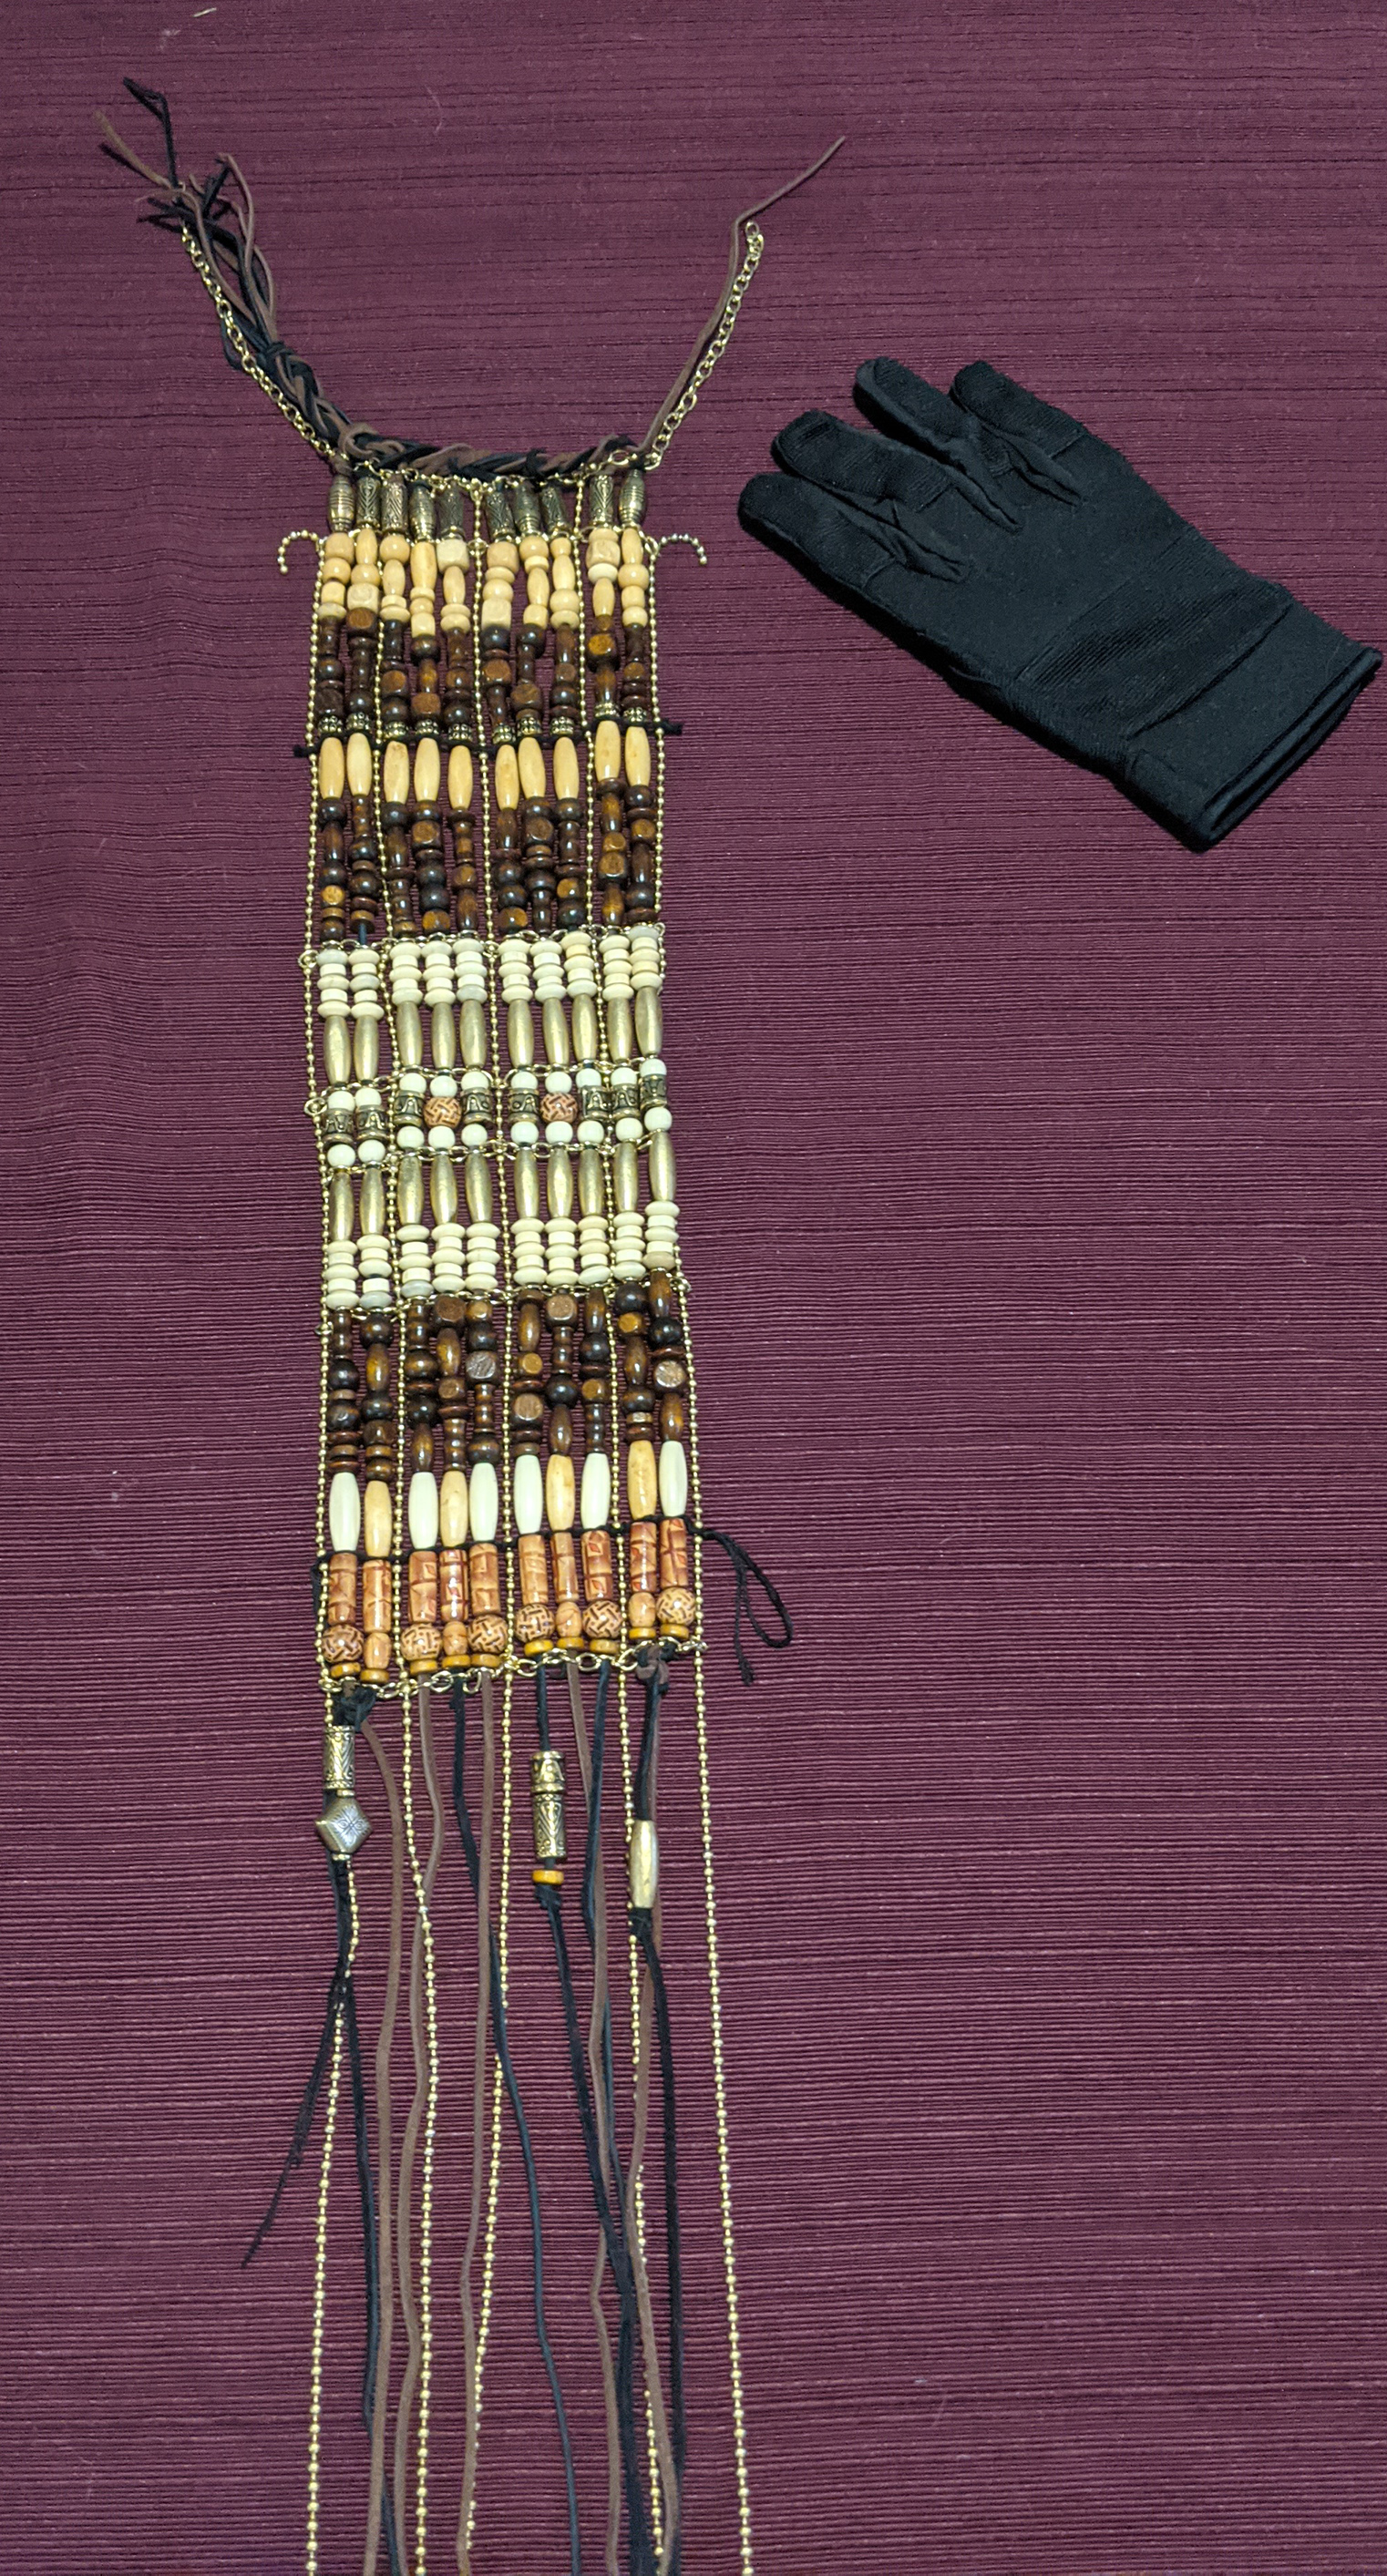
Either way, I have one question about the skirt that I’ve yet to figure out. It will be an easy one once we get more high res images, but for now: is the skirt attached to the apron, or are they separate pieces? Look at the below photo for what I mean:

It looks like the apron COULD be attached to the same waistband that the overskirt is attached to:

On one hand, this would give a consistency to her look. People on set would not have to constantly adjust where her skirt was sitting in relation to her apron. She could also adjust her costume between action filled sequences by just making sure the apron was front and center … and know that the rest was in place.

On the other hand, look at how it’s sagging. If it was attached to the skirt, there might be another waistband higher up that both the skirt and the apron are attached to, instead of the apron itself being part of the waistband.

Separate pieces, however, would let her adjust the skirt and apron individually, as well as provide for an easier time if one of them broke or ripped. Personally, I am going to be insanely paranoid the first few times I wear this thing that one of my beading strands is going to snap or something in the apron is going to fall apart (even though we’ve seen over the past posts how devilishly sturdy this thing is). If one part broke or ripped, I would rather be able to take one off to fix it than have to take both off to fix.

UPDATE: Well, someone else has just now suggested to me that it might not be a skirt at all, but a dress that’s been cut up the front and whose waistline is hidden undern an obi style fabric under her belt. Well. Shoot. That looks like EXACTLY what this could be.

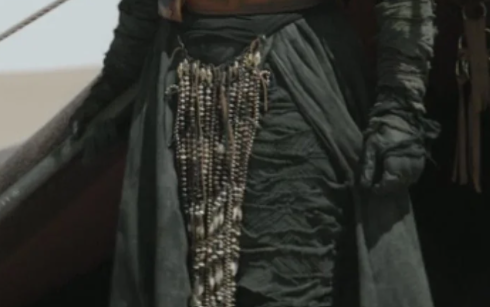
Granted, the 501st’s CRL on female Tusken outfits lump “dress/inner robe” into one category. So I guess they could be separate. But I like combining them to get rid of the waist bulk that the skirt’s waistband would cause. I particularly like this image taken by J.L. Ramsaur Photography (right).

Just like our bobf warrior, the sleeves and skirt in this outfit match each other. Obviously we can’t see a waistband or belt in this image, but making it a dress of sorts would make the whole thing easier to wear, easier to move in, and would keep sand at least a little more at bay.

*SIGHS DEEPLY* I guess I could make that modification! I already had this whole part done, lol. Well. I guess I’ll be presenting TWO WAYS to make this piece.

BUT FOR NOW, we’ll focus on how I put together my original take on this.

I knew I wanted a front opening skirt with a back closure. The star of the outfit’s front is the apron, and it shouldn’t be overshadowed by a drawstring or something. I also knew that I’m FINALLY starting thyroid meds soon (yay!) and might be losing a crap ton of weight, so I want this to be adjustable to my size.

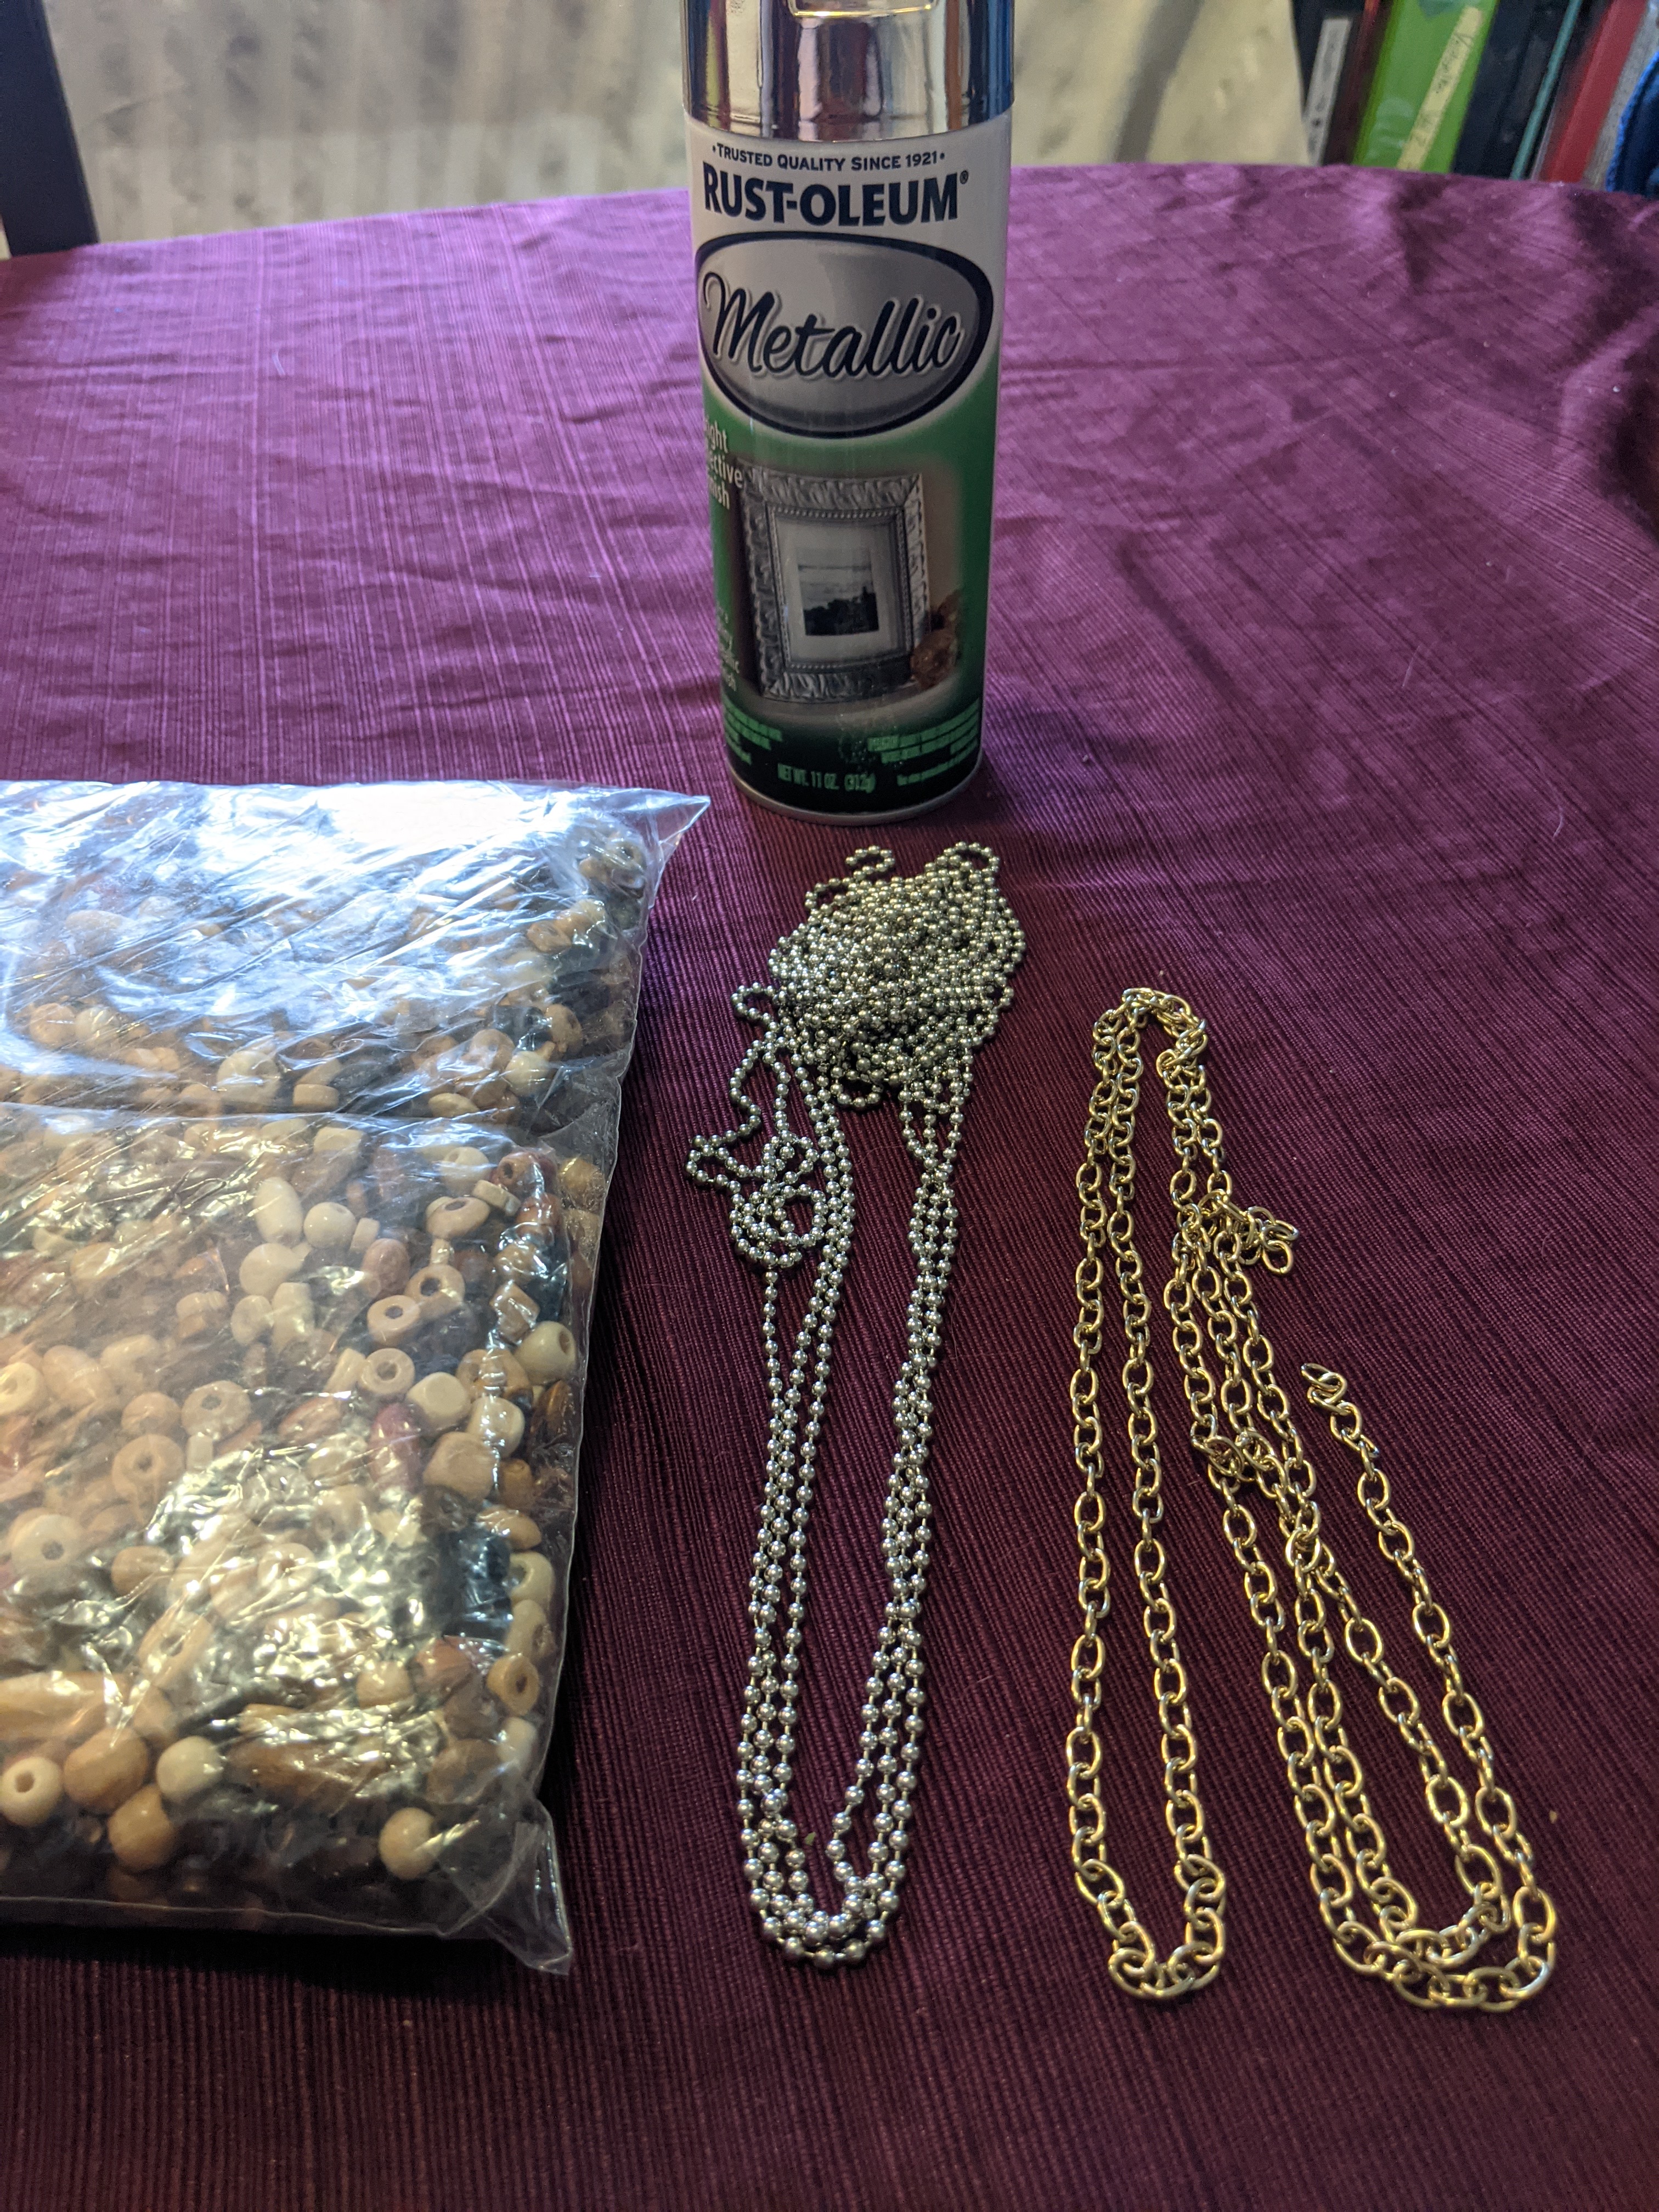
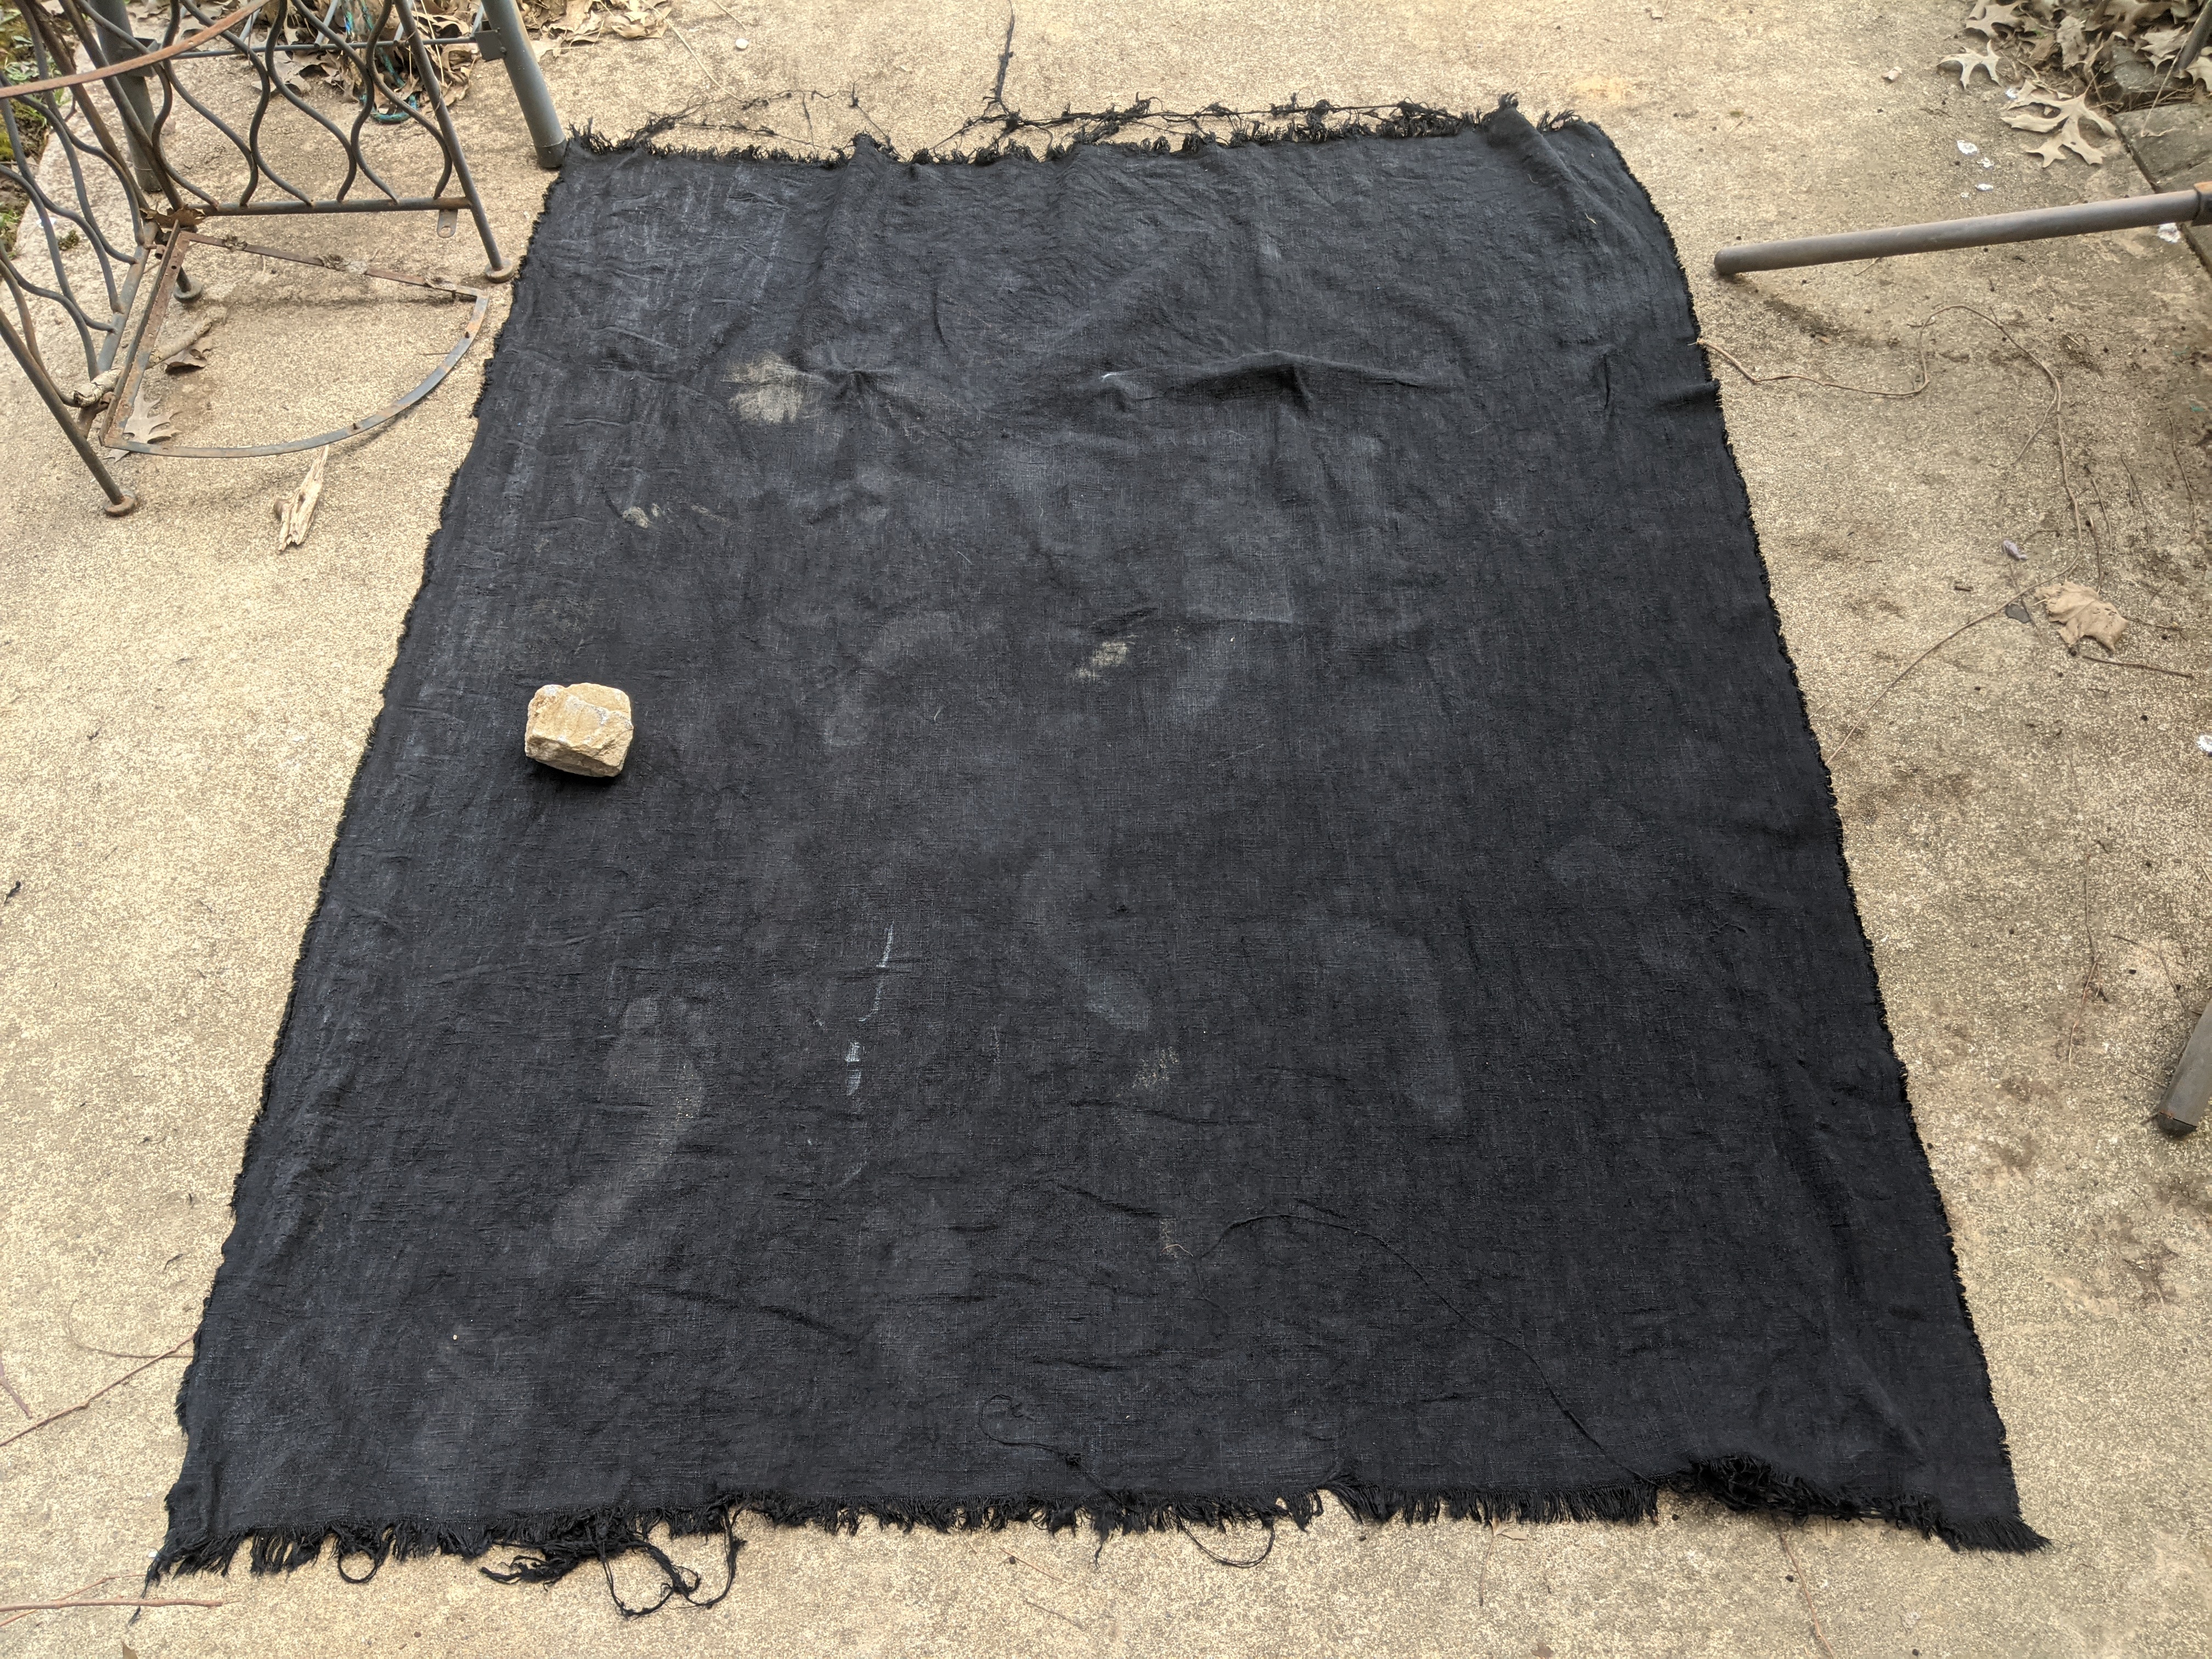
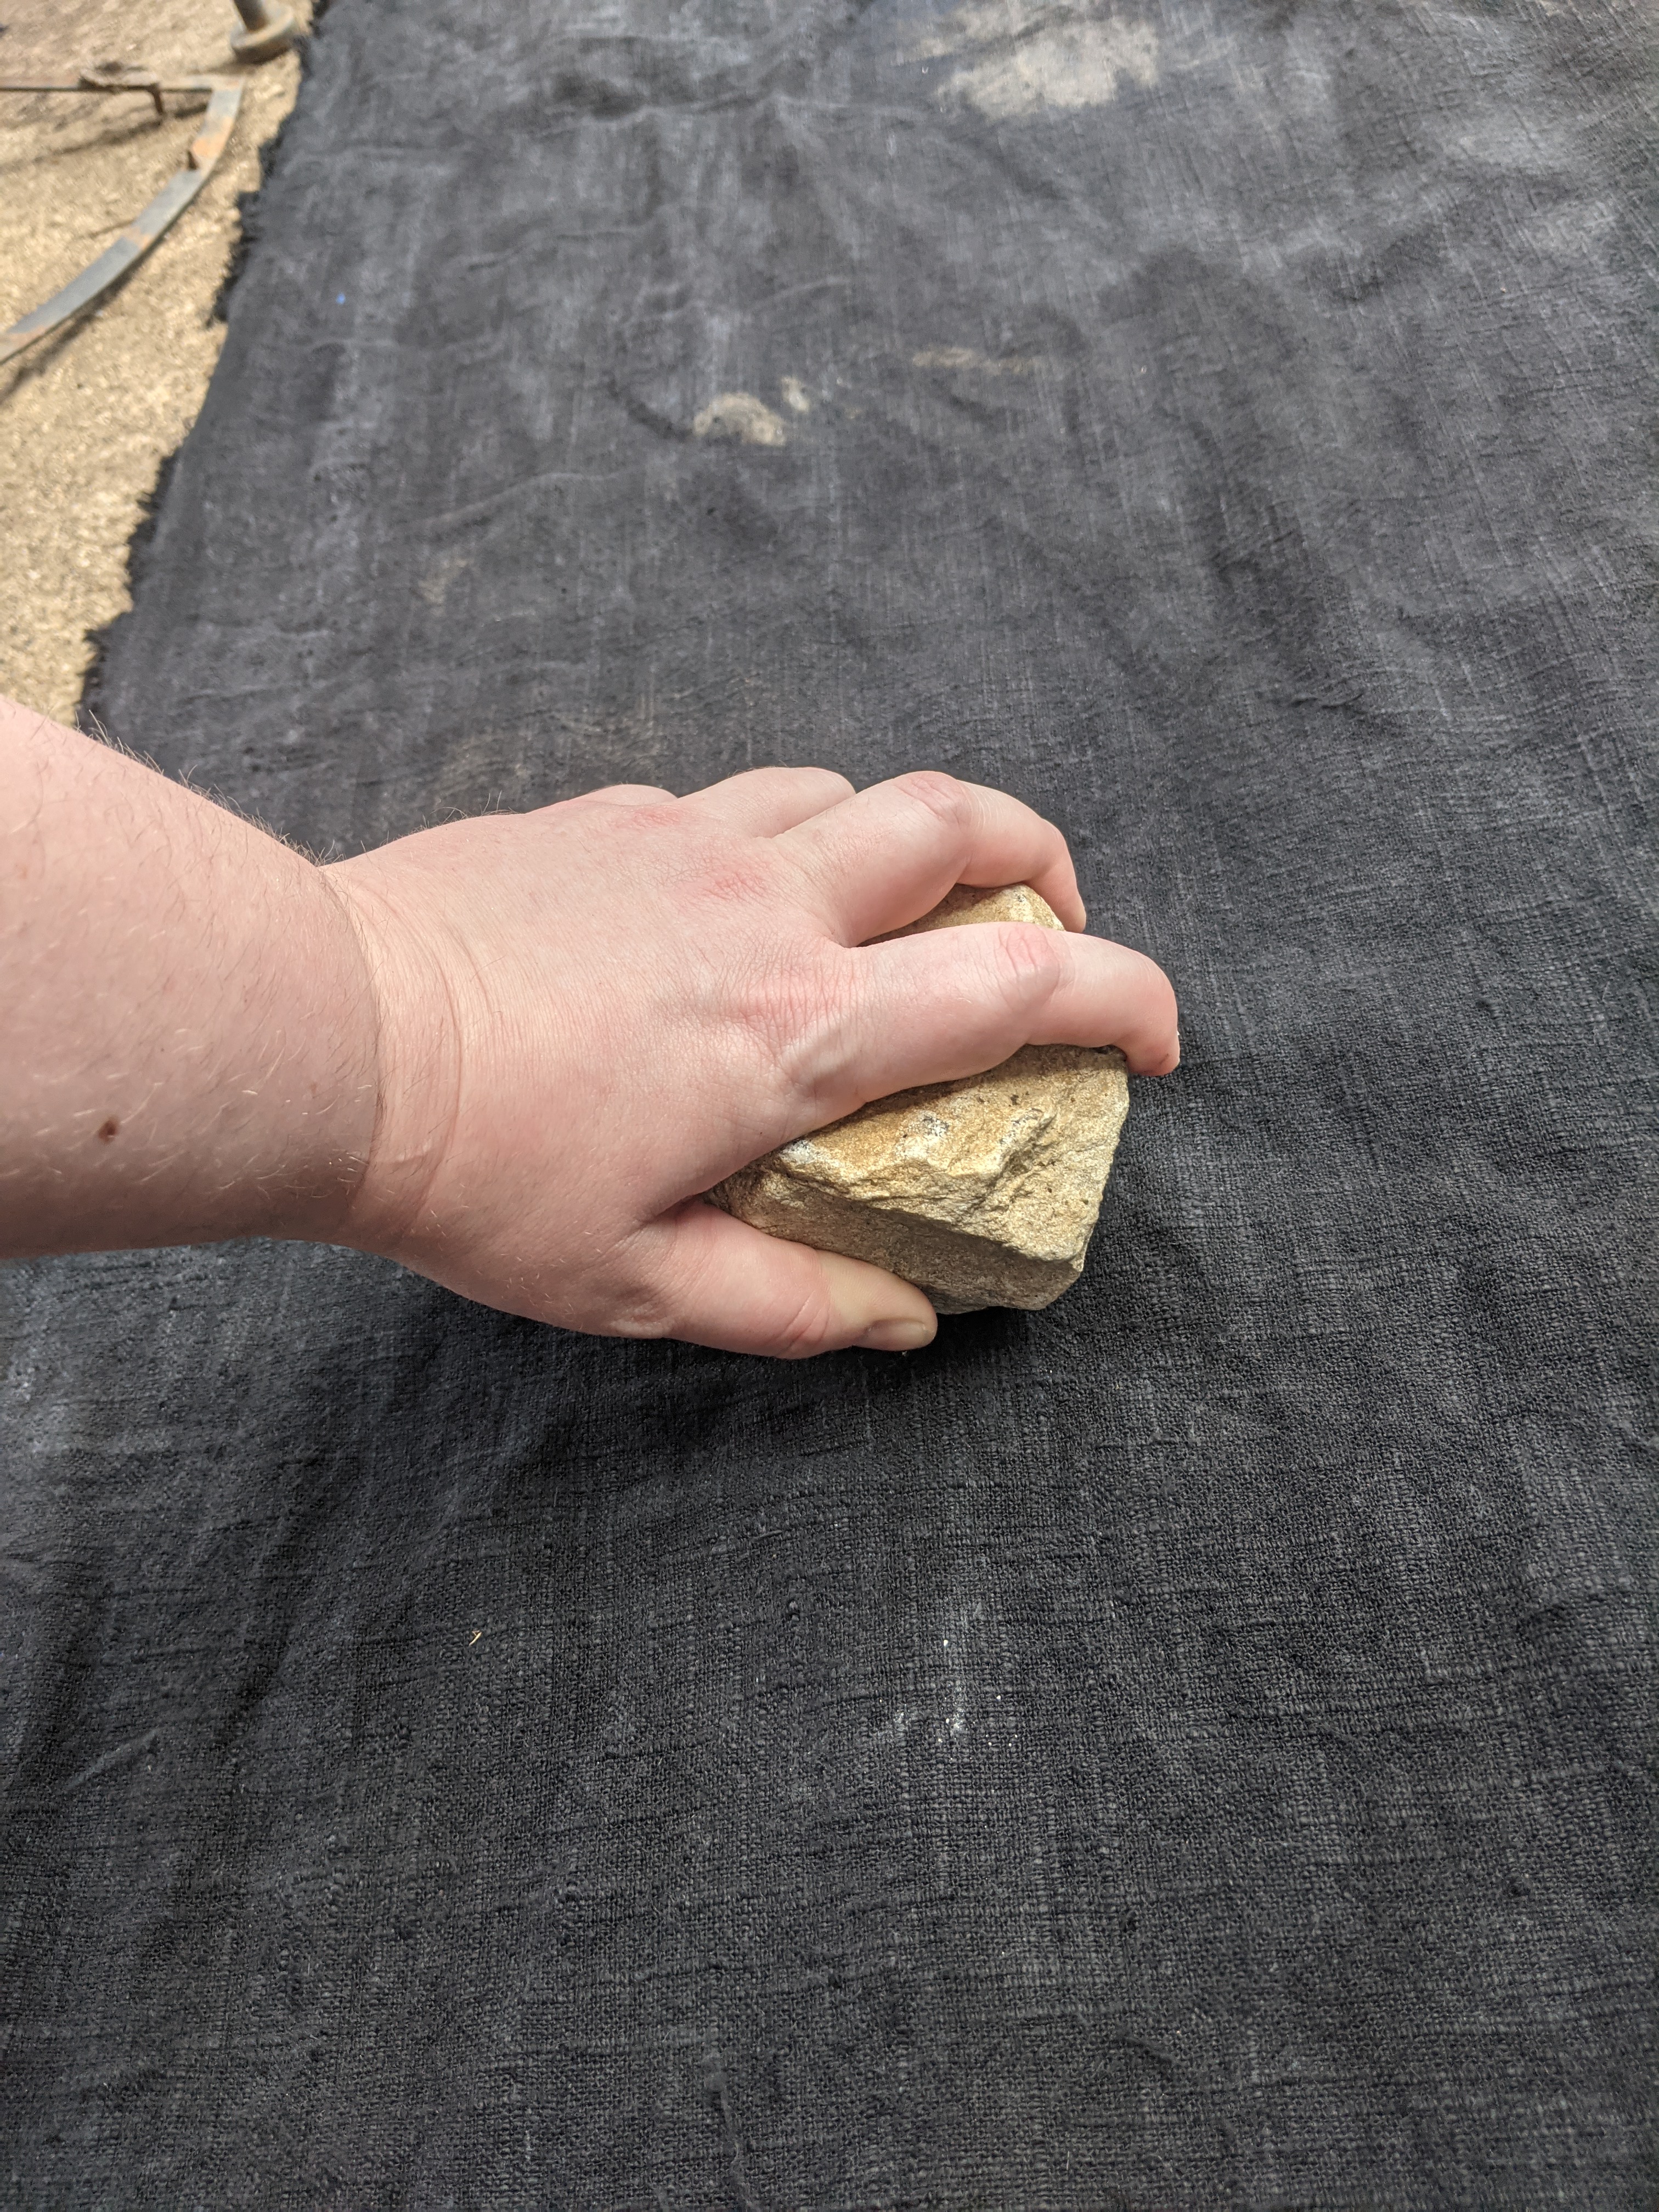
I also knew that the Tuskens weren’t going to be cutting fancy skirt shapes. I have a wide rectangle of the skirt fabric and a smaller remnant piece that I bought. I folded the remnant in half and cut a triangle.

I forgot to take pictures of how I put this together, so I drew out the steps. Cut the wide rectangle in half, insert the triangle, and stitch back up like so:

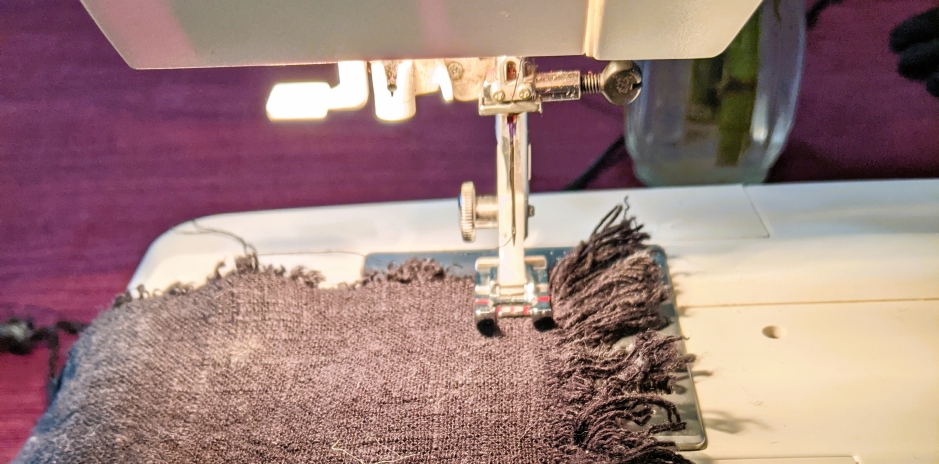
DO NOT. FORGET. TO ZIGZAG YOUR SEAMS. Or serge them if you’re fancy and have invested in a serger. Tusken fabric is going to fray at every edge, and we just don’t want to deal with any of that on the insides of our costume. Don’t just use fray check or glue, that’ll just make it more stiff and scratchy along the seams. Please promise me you’ll zigzag inside!

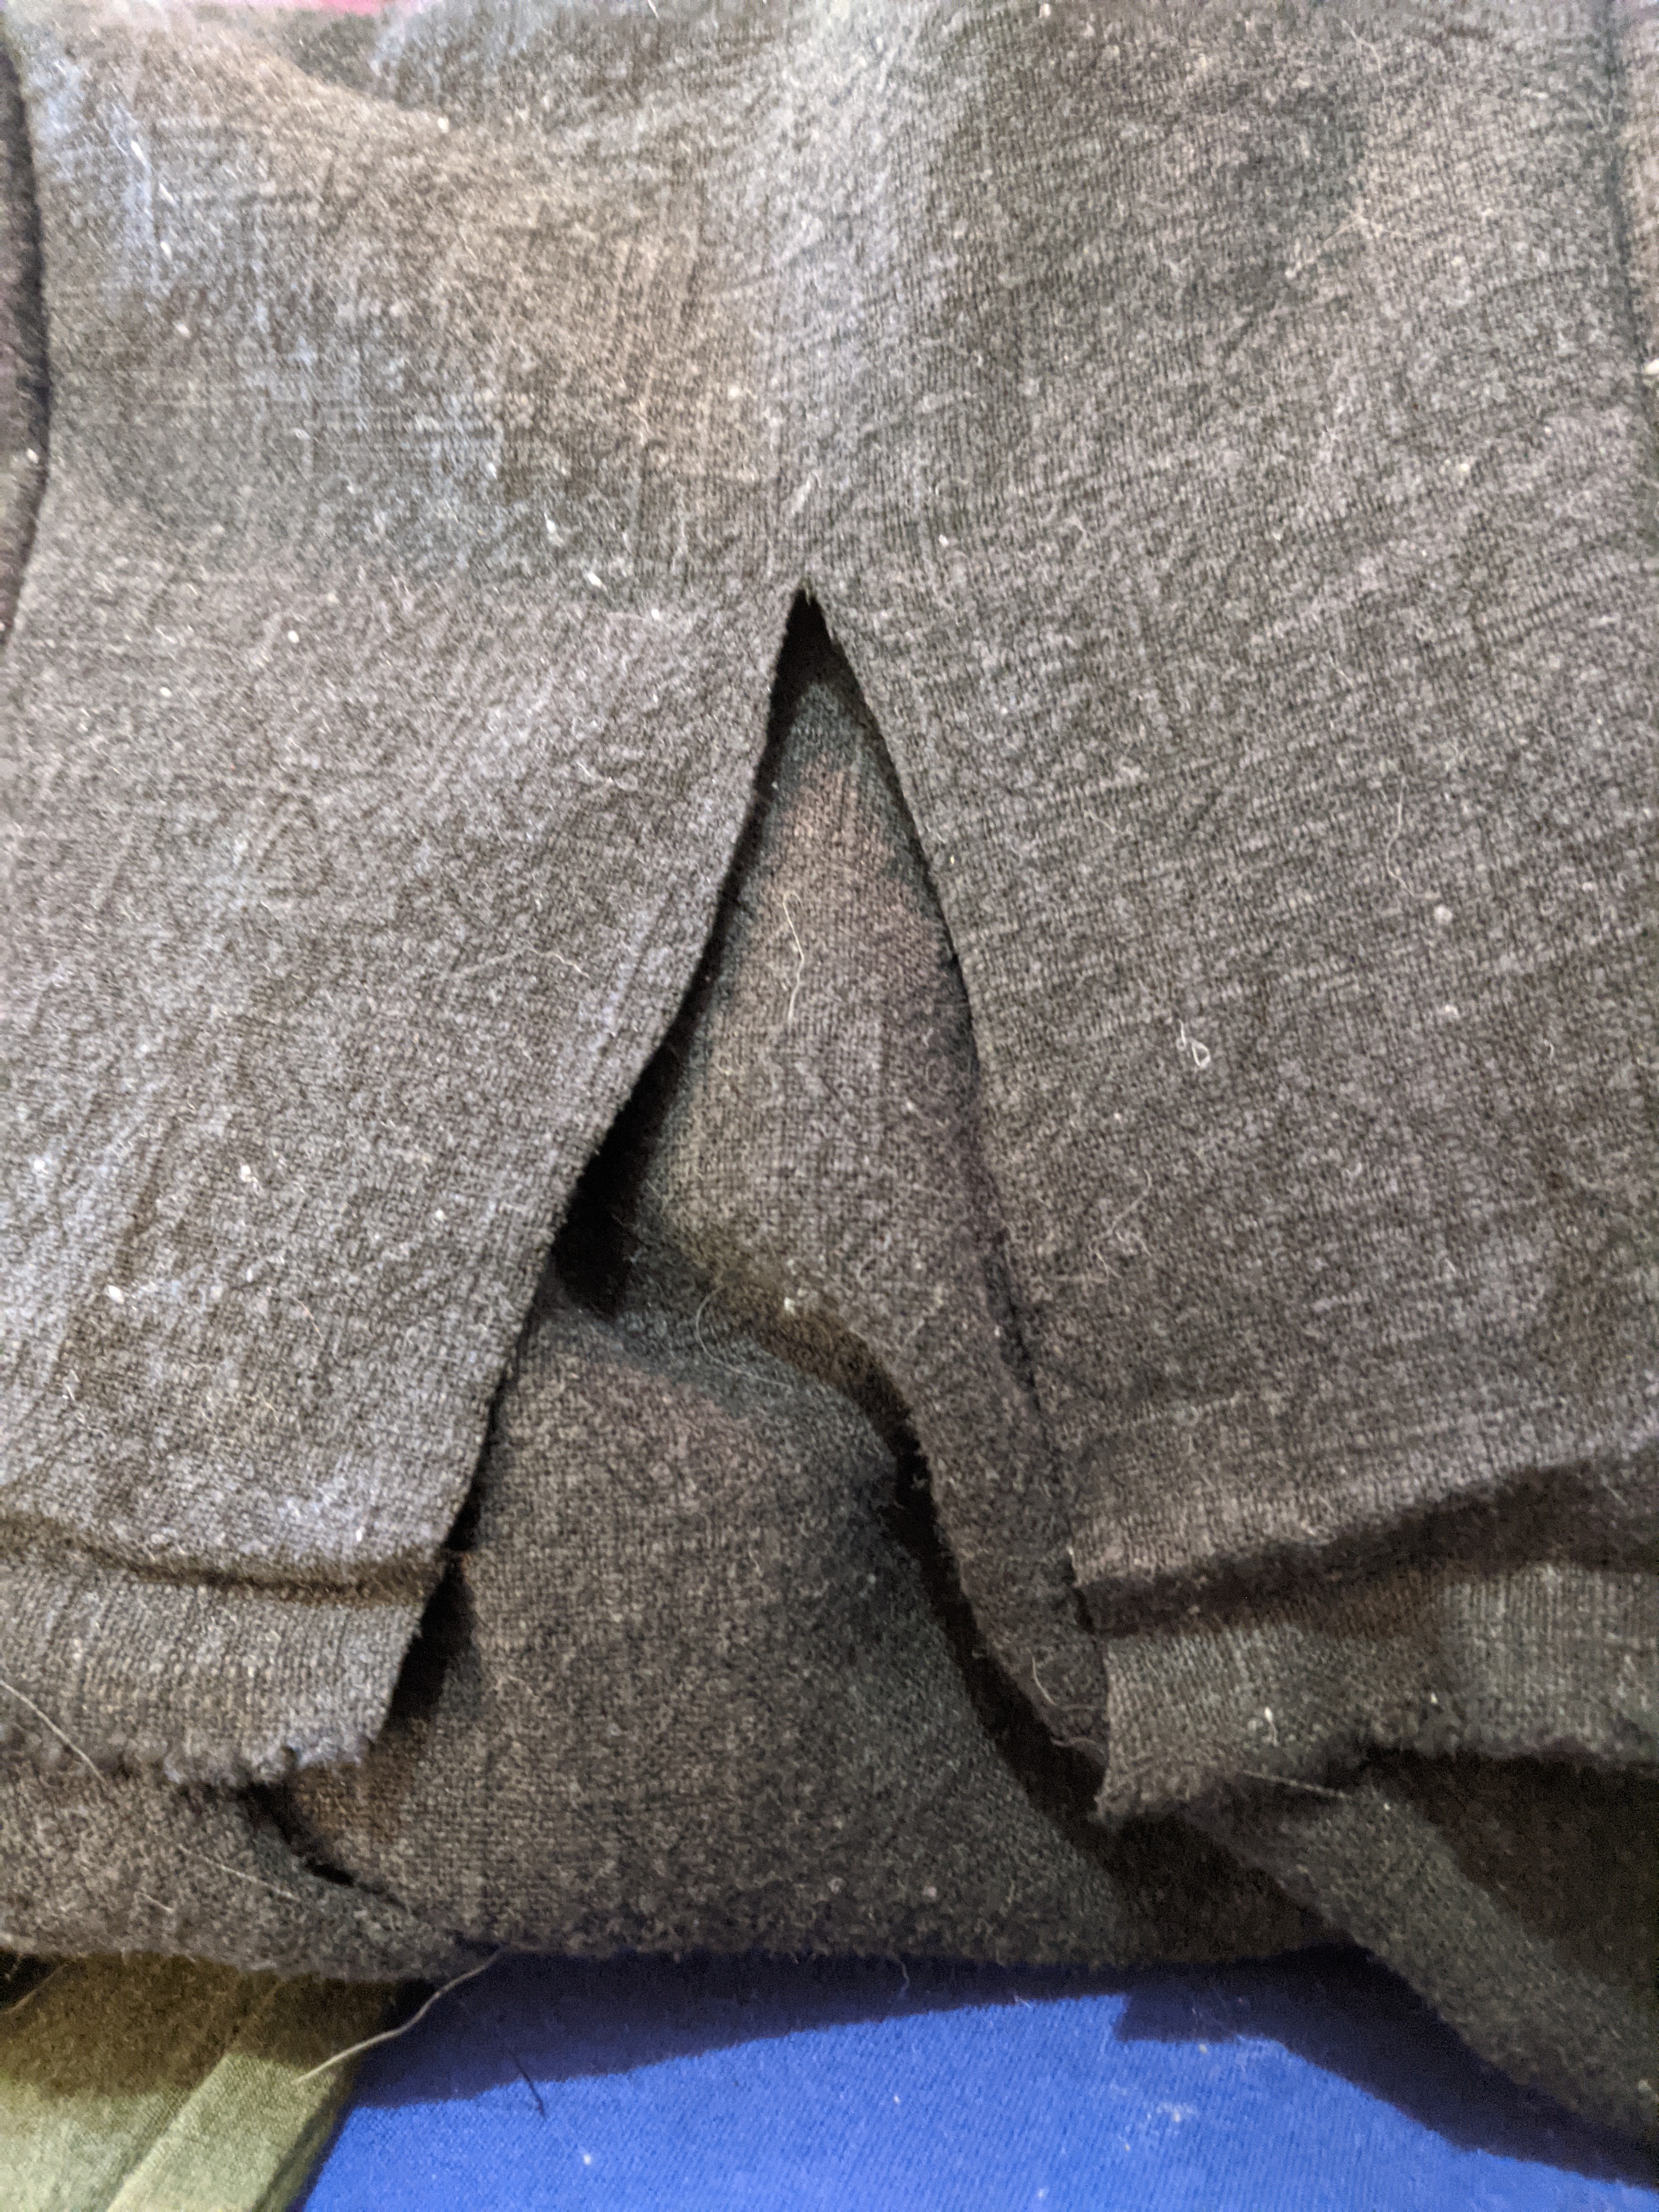
For the back closure, I made a cut (I just realized I didn’t measure it — it’s probably 6″ – 7″?) and then stitched it down in a hem. I then folded down the top of the skirt and made a channel along each side of the skirt top.

Because this fabric is so easy to work into place, I was able to tuck the edge into the drawstring channel without even any ironing or stay stitching (see right photo below):

I couldn’t find a cord offhand that could be used as a drawstring, so I just threaded one of my belts through the channel and popped it on my dressform that way.

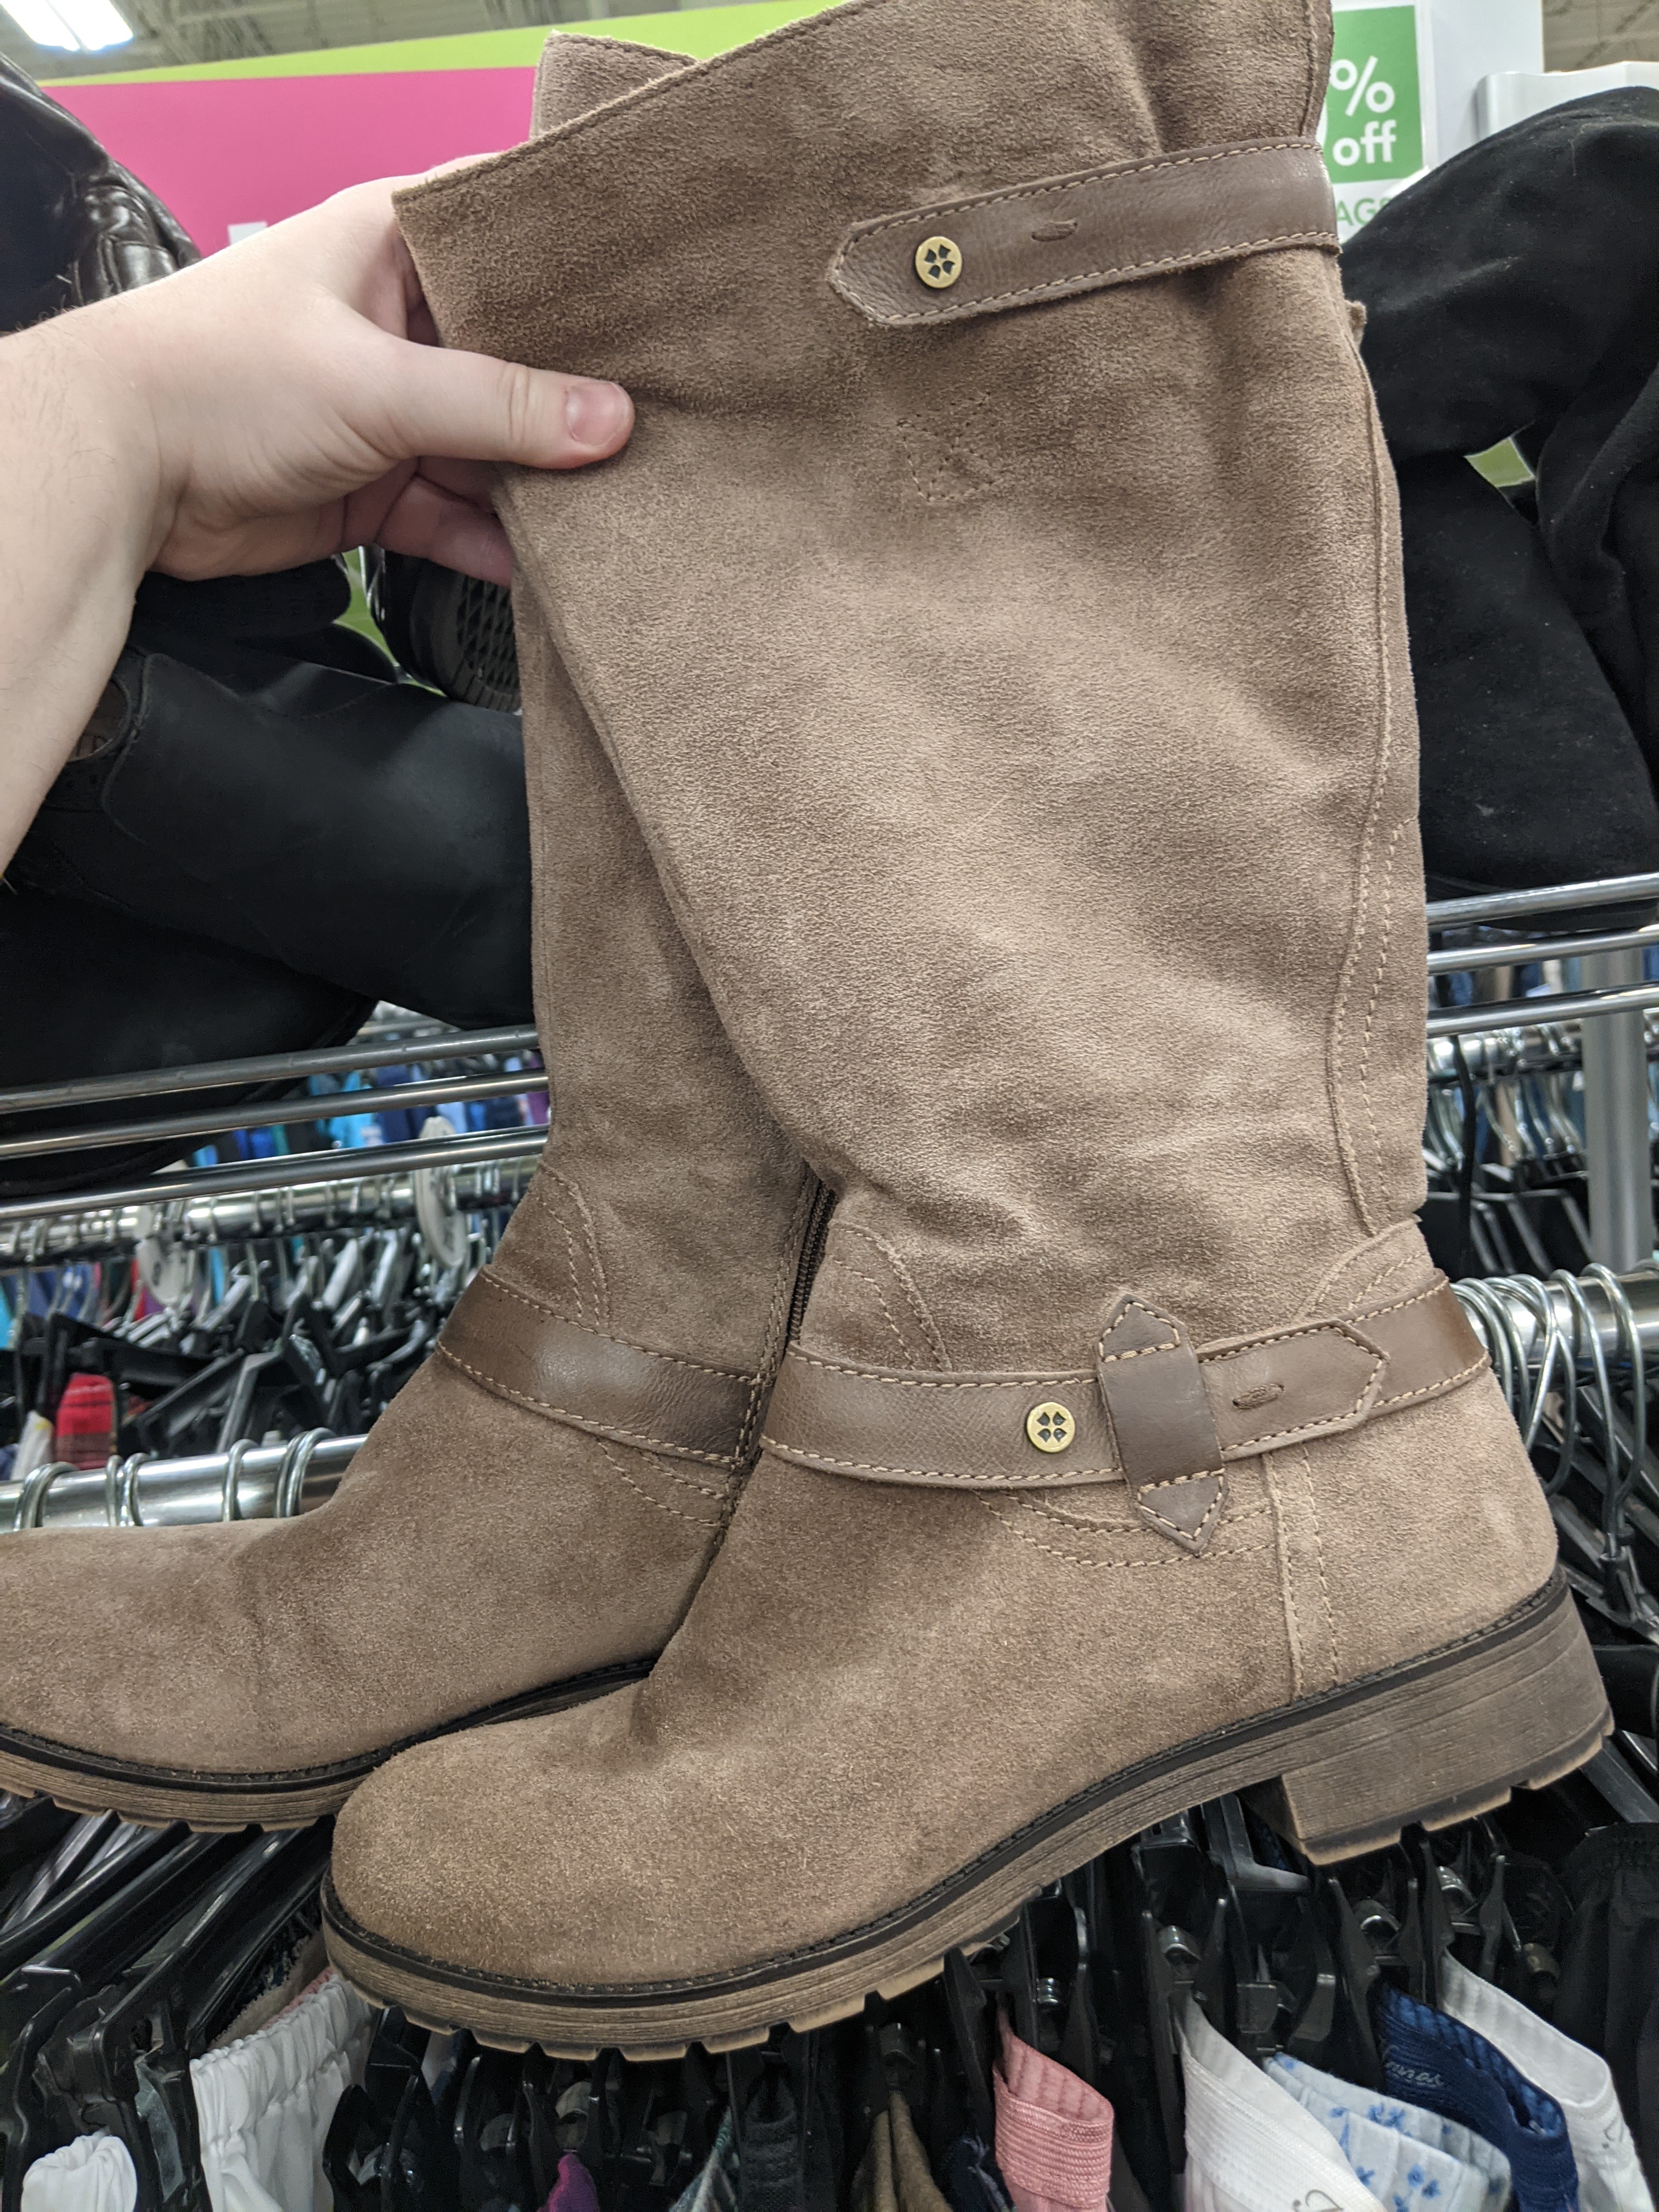
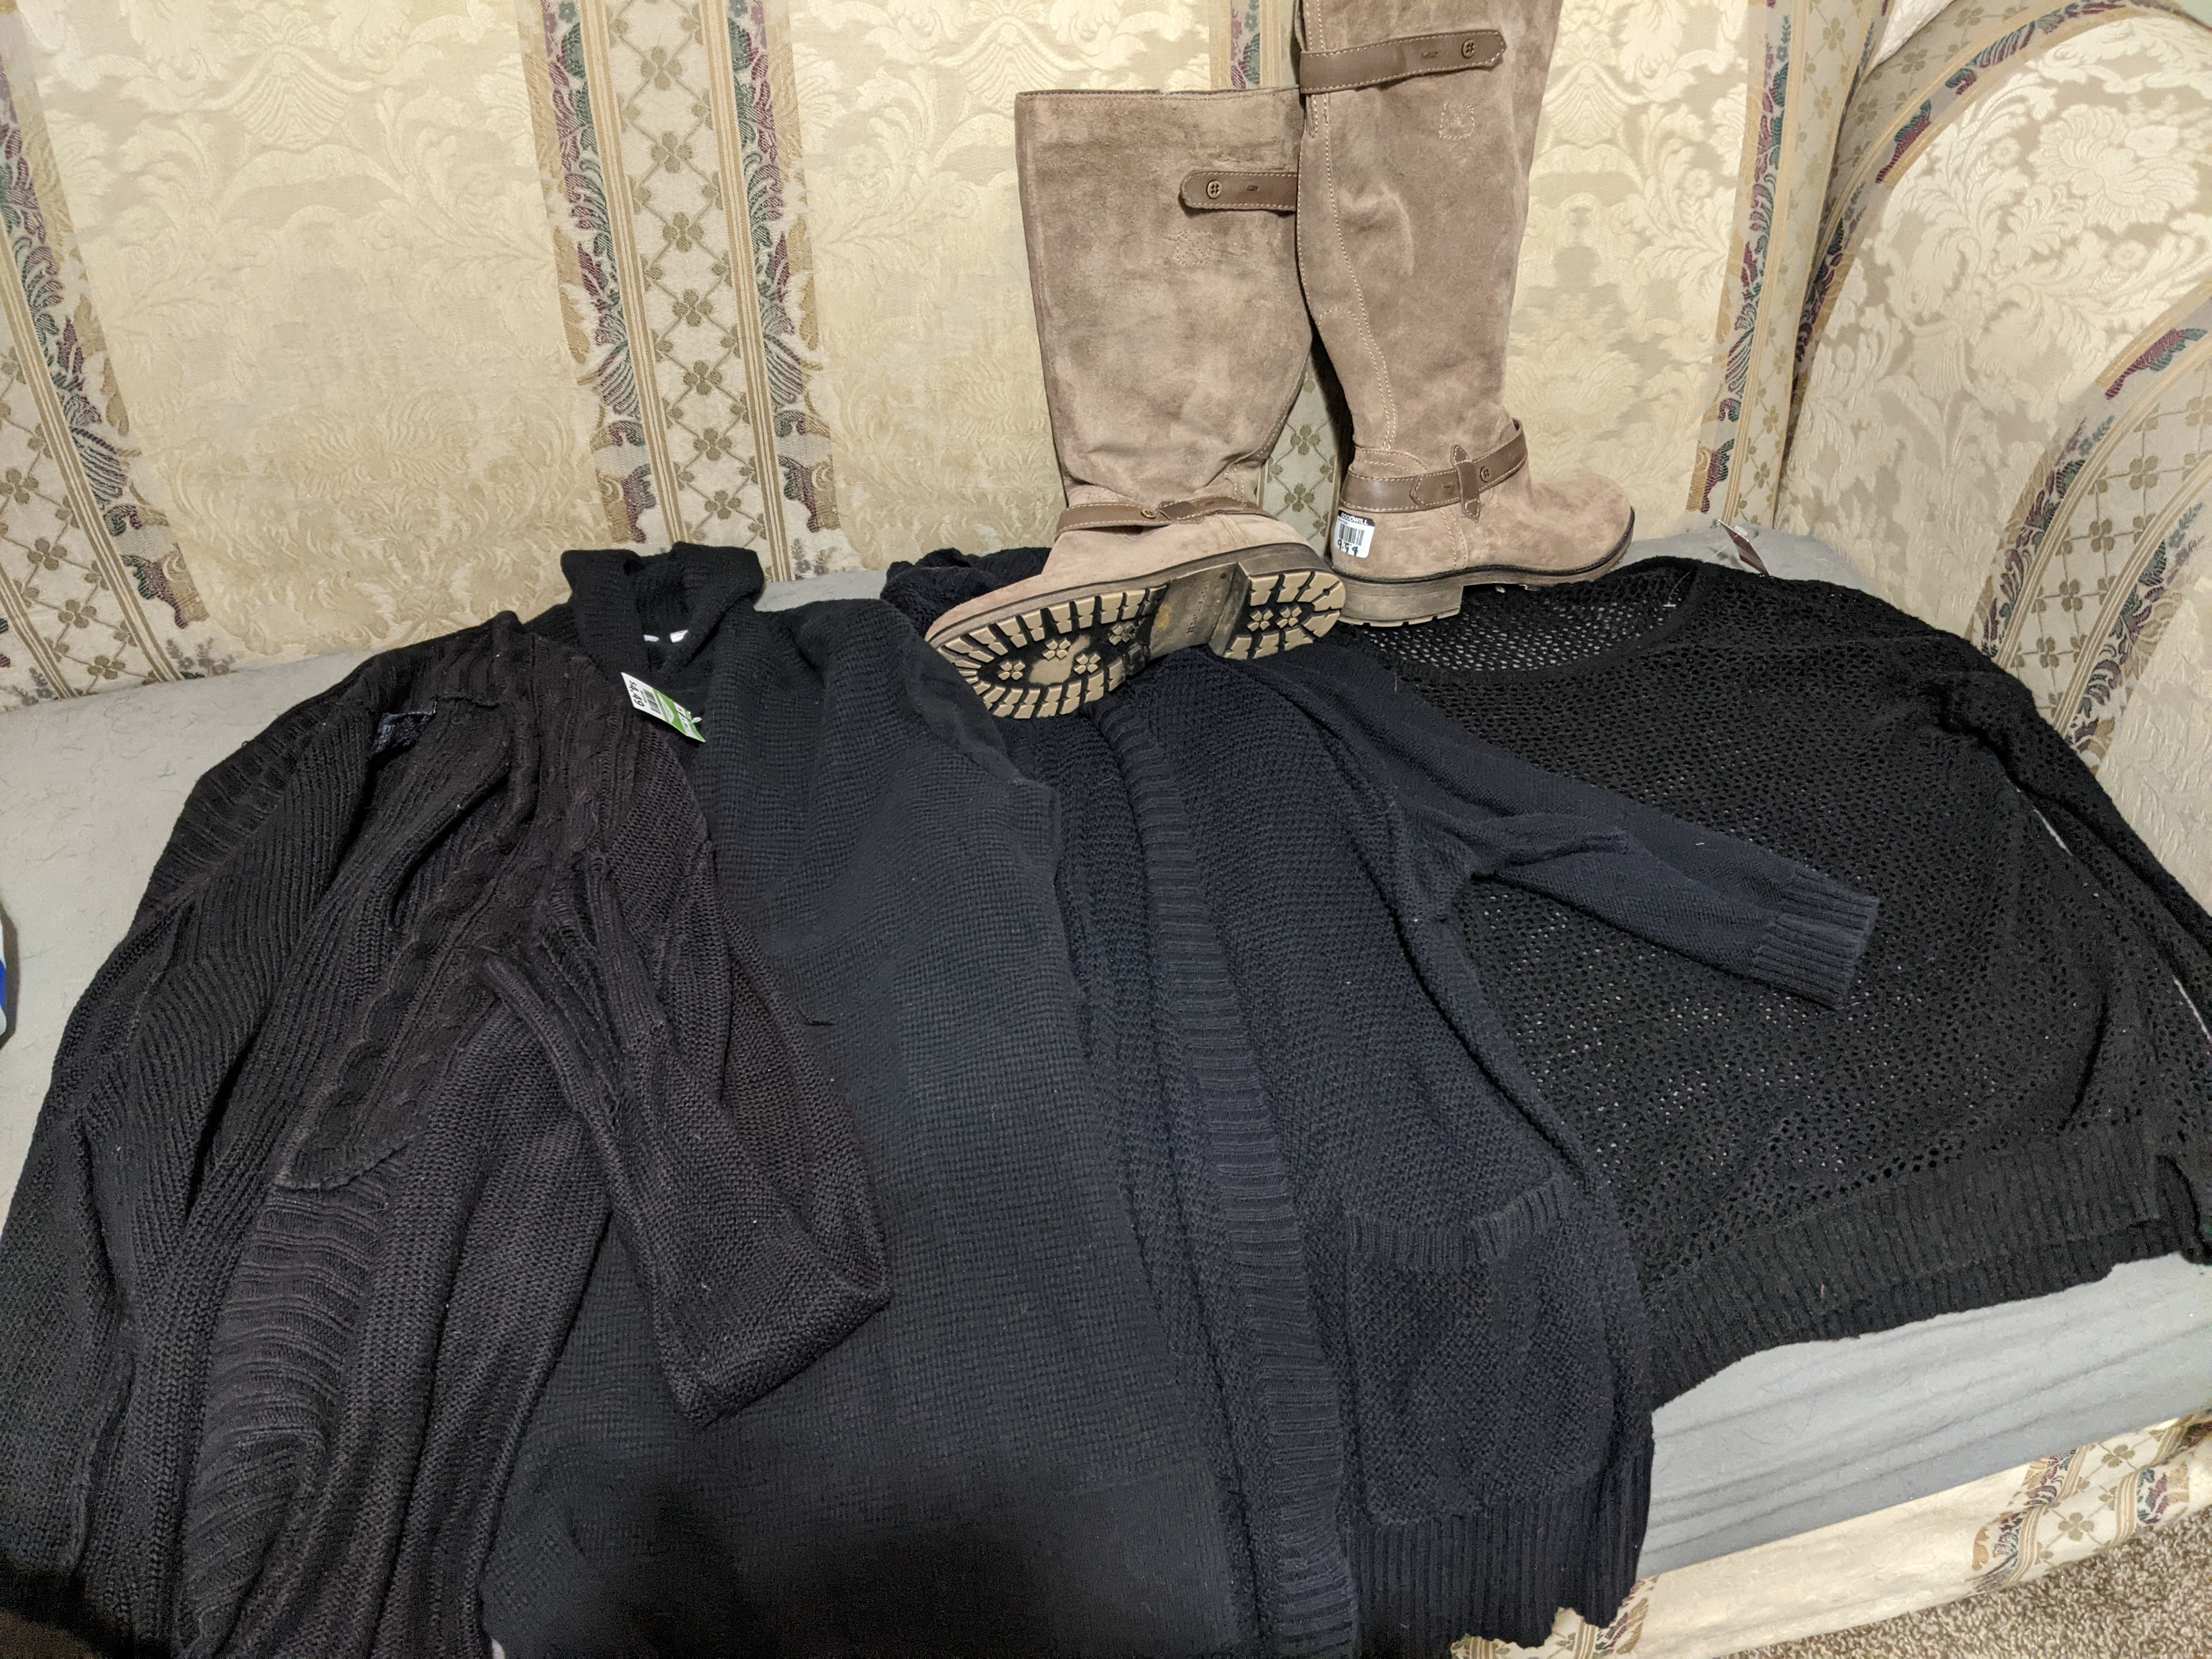
I hung the whole thing on my dressform, put the dressform up on my table, and cut the hem to where the top of my toe would be in the boots. **DO NOT LEAVE HEM ALLOWANCE**. You will not be hemming this piece! You will instead be cutting this to exactly the length you wish to have the skirt, plus a little fraying.

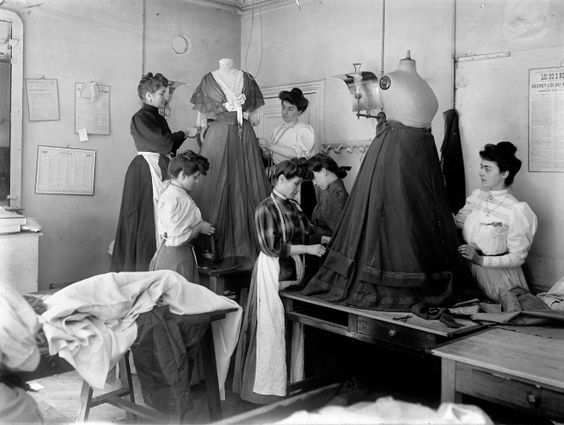
Again, I forgot to take a picture, but here’s a historical image showing how to not ruin your back (like I did for years by sitting on the floor) while cutting and working on hems and dress bottoms. If this is how the ladies of Paris’ House of Worth did their skirt bottom detailwork, it’s good enough for us!

For the bottom, I threw the finished piece through the wash to let it fray, then stitched a single straight line across the hem area above the frayed bit. This will prevent fraying above the stitch line. Do this also up the sides. We will be doing this anywhere there is an exposed edge!

For now, this is how I’m choosing to do my overskirt.

My glorious sketching skills…

If you wish instead to use the dress method, you have a few options. One is to make a tunic and just cut a rectangle out of the front.

Another maybe thriftier way is what I may end up doing depending on how my current build works out: just attach the skirt you’ve made to a turtleneck. Again, leaving a gap in the front, so that the final product looks like this (left).

I have no idea if I’m going to attach them or not. I think it depends on how much bulk I end up having at my waist when this is all done. If I want to reduce the bulk, I’ll make it all into one piece. We’ll see.

I’ll do the start of the capelet in the next post! But I really *really* need to figure out how I want to weather this stuff. I’ve got test swatches soaking in lemon juice and in white vinegar right now to see what both look like because I had both lying around the house. But honestly? I’m probably going to end up just going and buying some bleach at some point. Also, keep your vinegar soak either in a well ventilated area! I think containing it like this is safe too, but don’t quote me. Probably should have looked that up before starting …

Tusken Warrior pt 3 – Beaded Apron Completion

We left off with the late-night realization that the apron is beaded on leather cords.

I’ve used rough leather cords before in many a medieval garment and knew two things off the bat:

  1. These things are weak and snap quite easily
  2. They are going to be difficult to thread since they are so rough, and the wooden beads are also rough. But since the cords aren’t too strong, I won’t be able to tug too hard.

The Final Supplies:

The answer to the first issue is to add a strong beading thread to each cord. I found a black one that I’d used before on other projects and have not had one break on me yet.

As for the leather cord, I found packs at Joann Fabrics that came with both black and brown. They had spools of each color, but in larger widths. I took a few of my beads with me to make sure they would fit on the cord … and these were the thinnest in the store (and the only ones to fit my beads). I bought three packets because each had 8 feet of each color cord. I needed 5 sections of each color, each at least 3.5 feet long. (I cut each in half and had half of a packet left over).

I also found a bag of gold colored beads that I grabbed. The apron has some gold beads in it here and there, and I’d attempted to spraypaint some of the wooden beads the day before, but they did not turn out looking quite the way I wanted them to.

The Apron:

This is made of ten strands of beads on leather cording with ten strands of gold beaded pull cord (doubled up).

Unfortunately, I’d only bought enough of the pull cord to do one strand at a time instead of two, but I realized that this was alright since the chain I bought could not have fit two strands inside a link at once. I’ll get to why this is important later. (You can see in the below photo the ten separate beaded strands, as well as the placement of the 5 columns of pullcord).

Starting out, I picked out ten of my top anchor beads. I was going to use the spray painted ones, but again, they didn’t turn out how I’d have liked. Also, the apron’s top beads have a design to them, so I wanted to mimic that. The packet of “gold” beads I bought at Joann’s only had four of the oval shaped ones that I wanted to use, but interspersing some of the column beads looks very similar close up … and even more so at a short distance.

Notice the doubled up pull cords. Also the pattern of the strands: 2, 3, 3, 2 … with pullcords dividing those sections.

I started by knotting together the leather and bead thread, threading on the first anchor bead, and then adding the chain below them. NOTE: I initially did not leave a link on the outside to hold the outside pullcord. I went back to add one later.

While the leather cords could just thread through the chain, the beaded pullcord could not. I had to use jewelry pliers (well one set of jewelry pliers and one set of regular pliers because I couldn’t find my other needle nosed ones) to open a link, insert the pullcord, and close the link back up.

I also did not have wire cutters lying around, but I DID have heavy duty dog nail clippers for my 85 lbs black lab. Those cut the pullcord just fine.

Eventually I got the first row on. NOTE: this is not actually the first row of chain. I didn’t know how much chain I was going to have at the end of this project (or if I was going to need to go buy more), so I decided to leave the actual belt part for last. At the end of the project, I added the remnant of the chain to the very top of the apron. Turns out I got lucky and four feet was exactly the amount I needed.
Because I needed room to add the topmost chain piece, I made sure to leave generous tails on both the leather cord parts as well as the pullchain parts.

The first section I just matched the colored beads that I had to the images available of the apron.

A few notes I’d like to make here if you are going for that extra level of SUPER accuracy:

  • MOST of the beads in the apron are what I call the “flying saucer” shape of bead. Actually, I just googled that and they are in fact called “saucer beads”, heh. Now, I did not get only saucer shaped beads, so I took liberties in which shape of beads I used and where. From a distance, it’s not going to look too different. In fact, I like the variety better. But whether or not you collect only saucer beads for this project is totally up to you!
  • Tuskens would NOT be using wooden beads. Wood is just way too scarce on their planet. Yes, we see some withered stumps in BoBF, but they aren’t exactly stumps worth chopping up and turning into decoration. I’m not sure what they used on set, but my conclusion is that they would be making beads of bone.

If I had a lot more money and I wanted to make this in as ACCURATE a way as possible, I’d probably invest in beads like this off of etsy etc. Bone beads are not uncommon, and saucer shape is also very common for beads. Just make sure the holes would be big enough to fit on your leather cord. Wood beads are far easier to shave and widen the holes of than bone.

Other materials I considered were stone, clay, and faience. But bone is far easier to work with than stone, and equally available to the Tusken tribes. Clay would require sourcing it from somewhere with water nearby.

Faience might be an interesting materiel for Tuskens to use. I thought about glass at first since they have no shortage of sand … but the temperature a kiln needs to reach in order to create glass just isn’t mobile enough for their nomadic lifestyle. Faience is a fake glass material developed in ancient Egypt and the Tuskens could absolutely create this material. But depending on the chemical composition of your sand, they are more likely to have a blue or green hue than the natural colors used in the apron. Moreover, faience is usually applied over a clay base, but I suppose the Tuskens could apply it over a stone bead too.

Whoever said a degree in archaeology wouldn’t come in handy when building cosplays? 😀

Back to the Apron:

Yall, I spent 2 and a half days on this thing. The fact that the beads fit so snugly on the leader cords was GREAT because I know it’s going to keep the weight well distributed … but it also meant that I was in for a very long hand-cramping time. For some beads, they slipped right on. For others, had to employ the use of a sewing pin to help shove the leather through the bead, or to shave the inside of a bead down so that the cord could go through.

I would thread the bead thread first and then the leather cord. I pretty much eyeballed the pattern based on the closeups that we have so far. The top segment looked like 6 lighter beads then 6 dark ones. After which, they are held in place with a braid:

So this was another place I had to make a stylistic decision, which I’ll stand by until better high resolution photos are published of the actual apron. The “spacer” piece that end this section looks like it could either be chain, or a black braid of some shiny sort. I’ve heightened the contract on this photo to show you what I mean:

To me, it looks far darker than the actual chain segments, and it’s a little less even. So I opted to use a shiny black floss to make a braid here. I thought briefly about using a shiny leather cord, but I couldn’t find one thin enough. I’m sure it’s available out there … but I had this laying around and again, I figure it will look very similar from even a few feet away.

It was at this point that my dog got really sick and had to be taken to the doggie hospital (he’s fine and recovering!). But I ended up spending the next day beading my worry and anxiety away without taking any photos while he was half a city away with a doggie IV getting fluids and meds. 😦

I It was by this point that I’d created my own narrative for this piece and was even thinking of writing it’s background in fanfiction (this is how tired I’d grown, yall). The second section is almost a repeat of the first, with lighter beads followed by darker ones.

The Apron Center

By the center of the apron, we see the chain spacers very clearly in reference photos. This is also where it got tricky because, as you remember, the beaded pullcord doesn’t fit through the chain links. So I would have to thread the leather bits in (every other link, leaving a link for space), and then use the pliers to open links for the pullcord.

Even this worked out really well however. As annoying (and hand-destroying) as it was to open and close such small links, the pullcord made for a real stopgap. Let me tell you, the pullcord is NOT coming loose from those links! There isn’t going to be *any* sliding around at all.

You can also see in the above photo exactly how much “sawdust” I’d started accumulating by scraping out the inside of the holes in some of the tighter beads with my sewing pins. This pictures was definitely taken after cleaning up a bit. Wood shavings were a fact of life while making this thing.

At this point, I was finally able to use my spray painted gold tube beads in the centerpiece! I like that they’re less yellow that the ones I’d bought and used as the anchors. I also used saucer beads and plain ring beads in a symmetrical pattern here to emphasize that this is the important part of the apron.

In the apron’s centerpiece, the middle tubes and the middle row of smaller beads are all much shinier or lighter than the rest of the garment. There is also a gold charm hanging in the bottom third of the below picture that is almost definitely gold. I used that charm to decide that the centerpieces were also probably gold. (Again, higher resolution images of this piece could prove me wrong, and that’s ok!)

I used as the middle beads some of the shorter gold tubes that I’d purchased in the same pack that my anchor beads came from. There were only eight of this style though, so I added two of the painted wooden ones for balance. It reminded me of a pair of eyes, and thought that could be appropriate … whether the eyes of an ancestor or of a particularly proud hunt or conquest. Or a jawa, which if I’m being honest was my first thought, lol.

The Apron End

Under the centerpiece is one more row of dark beads, one more row of light bead, another braid, and then some red beads that are very distinct from the rest of the piece.

Thankfully, my wooden bead collection included some of a similar color!

Looking at these two photos side by side I may have done better by using a darker conglomeration of beads instead of the last row of light tubes … but I was also deep in **anxiety** over my dog and I definitely started cutting some corners. Eh.

For accuracy notes, I would probably replace this row of tubes with a row like the first in the apron. (The first row was of our medium colored smaller beads).

At this point, I’m also fairly convinced that the “braid” spacer is made of a thin leather cord. But I don’t think I’m going to go back and replace mine. I would probably purchase something like this.

I hung some gold beads like she did along the bottom. I even had a square one, although it did not fit on a leather cord no matter how much I pleaded with it. So instead, I hung it from the ends of my spacer braid.

This is also where we have to tie off our bead cord.

I ended up tying them together in sections. Between each pullcord, I tied the bead thread together (with two strands on the outside sections and three on the inside sections). Nothing fancy, just a LOT of paranoid knots. When the tails were cut, you couldn’t even tell they were there.

Here is the “final” piece!

I have “final” in quotation marks because there is still a bit to do. You can see that I took the remaining amount of chain and attached it to the top of the piece, hooking in the pullcord tails that I had saved out at the beginning. I also braided the leather tails out of the way, but those will be released and styled later.

Once I get this hooked onto the rest of it’s belt, I’ll unbraid the leather tails and style them appropriately.

I’ve included one of my Tusken (utility) gloves for scale:

I meant to post about the skirt that I’d gotten done tonight and the gloves that I found that are very similar to the ones used on set (and don’t cost $50 like the real things). But this had gotten long and I’m quite tired.

I did finish the overskirt today (all but the final weathering) and started on the cape. I’ll post about those in the next update. In the meantime, here is a teaser with the beaded apron pinned up on my dressform!

As a final preface: I am SHORT! 5’1″ short. (1.54 m short). There was no way I could make this apron to be as long as hers. Joanna Bennett is 5′ 8″ (1.73 m) and that extra 7 inches is killer. In order to get my apron to hang as high off the ground as hers did, I had to shorten the tails on the end quite a bit. But I’ll straighten them out and hopefully proportions will matter more than accuracy in that regard. As a short cosplayer and historical seamstress, I’ve found that proportions are *everything* to making an outfit look correct!

Tomorrow you’ll get an update on the actual sewing. For now, everything I have so far in all it’s un-wrapped and un-weathered glory:

Tusken Warrior pt 2 — Beads, Jewelry Chains, Spraypaint, and More Beads.

First of all, a few “Thank You”s are in order. Clan Krayt’s Forums, The Tusken Builder’s FB Group, and the Tusken Raiser Spoiler FB Group, have been AMAZING resources so far. In fact, it’s due to the last group that we have some decent pictures of the Tusken Warrior cardboard standup, which has details of her beaded apron:

So between weathering sessions of the black fabric I bought yesterday, I worked mostly on this piece.

My pack of beads arrived today. I bought this pack from Amazon. I swear I saw bead packets the size of each half of this being sold for $20 each at the craft stores yesterday.

Ceidilis 2000 Pcs Printed Wooden Beads

After studying the reference photos above, I noticed that I was going to need some small gold chain and also a few yards of “beaded pull chain” (the cords that hang from your ceiling lights and fans). Thankfully, these are easily and cheaply found at your local hardware store. Mine only had silver beaded pull chain, so I got some gold spray paint to go with it. Though this meant that I was going to have to use today to spray paint the chain instead of doing any assembly work. I bought 15 feet of the beaded pull chain (at $0.67/foot) and four feet of the small gold chain (at $1.47/foot). For the paint, I used Rust-Oleum Metallic Gold spray paint. I ended up using two coats.

While that was drying, I brought out my skirt and arm wraps fabric. It has been through three hot washes and two runs through the dryer so far. I laid it out on my concrete patio, stomped around on it a bit, and rubbed a rock across parts of it a few times (and I’ll be washing it again before I run it through my sewing machine, so don’t worry about the dusty footprints).

I then hung them up to sit in the sun for the day.

And this is what I sent to a few of my non-costuming friends when they asked what I was up to this afternoon. Sometimes you just have to be the weird sewing hermit…

While things were drying and sunning outside, it was time to tackle what became a much longer job than I expected it to be: sorting the beads. Note to self: 2000 is a lot when talking about beads that you need to sort through one by one.

This was definitely a job for a boba tea (procured on the trip to the hardware store), and some Boba Fett (eps I and 2 again for inspiration). Also helping were my ceramic bowls courtesy of my very talented Aunt! Each one made a differently toned “ting” when a bead was thrown in. Eventually, they were sorted by color.

Studying the top of the apron, you can see a first row of ten gold tube beads. I took ten of the light brown beads (since I think light brown will be used least in this project) and spray painted them outside next to the beaded pull cord. I took a picture, but it’s so shaded, the beads just look gray.

At least you can tell they look shiny …

I started laying out the pattern after this to see what the beads looked like in order based on the photos at the top of this post. But. Yall. I only just now noticed that the beads are strung on leather strip cord. Look close at these two images. She alternated with black and brown. *SIIGH*, I’m going to go shopping tomorrow for this costume for the third day in a row, haha! Well. More boba tea for me while I’m out I guess …

I’ll have to bring some of the beads with me to see if they fit on the leather strip cording before I buy it. But it looks in both pictures like the beads aren’t very loose on the cording. Actually, they seem like they have space between them.

YALL THAT ACTUALLY EXPLAINS SO MUCH! I remember thinking through the show that the apron moved like it was backed by fabric! (It did *not* move with the bottom heavy weight of something that was only beads strung on thread). I was originally going to string these and tack them to a black fabric backing every 6 beads or so.

HOWEVER if the cording fits snugly inside the beads, then the beads themselves will move less, and the overall piece won’t be bottom heavy. Which means that when she does a spin in a fight, her apron won’t come back around and smack her in the chest.

I’m also noticing that she has more than one little golden charm hanging here and there. So I’m taking this as further encouragement to use those charms that I found yesterday with the wave pattern on them.

I’m having a lot of anthropological Thoughts about these charms and this piece in general, but I’ll leave those for next time. I want to organize them a bit more before presenting any hypothesis.

Book of Boba Fett – Tusken Warrior

Holy cow look at that, I’m writing a blog again! Hello 😀

BOOK OF BOBA FETT (minor) SPOILERS. FYI.

So, like the rest of the star wars fandom I’m *obsessed* with the Tusken Warrior in Book of Boba Fett. I mean, she’s easily the most badass character in the show — and I’m including Mando and Fett in that list. Sorry, I’m not taking refutations!

So what’s a seamstress to do?

Make the costume obviously! It helps that I’m on vacation this week and just so happened that I didn’t have any current crafting projects in progress. (That’s a lie, but we’re pretending those don’t exist).

Step 1: Budgeting.

I don’t want to spend *too* much on this, so I decided to see if I could make this for roughly $150. Which also just so happens to be the amount I got in giftcards etc for my birthday last week. I know I’ll probably go over at some point like always, but ehhhh, I’ll actually try this time.

Step 2: The Mask (Research).

This is what would make or break me on this outfit. I’m a seamstress, not a prop maker. I’d like to get into prop making, but only once I have a workspace like a garage where I can blow sawdust everywhere and not immediately die. So I set out researching how others have made the mask.

I first tried to go to the 501st Krayt Clan forums because they’re my go-to resource for all things star wars costuming (who needs good guy costumes anyway?). Even if I’m making an outfit that isn’t going to be submitted for approval, the 501st (and yes, the Rebel Legion) are absolutely amazing resources for how to make these outfits look like they’re directly off of a star wars set. Unfortunately, there seems to be an email validation issue with the Krayt Clan forums right now and 24 hours later I’m still unable to log in. As is, the basic Costume Reference Library for Tusken Raiders is available here.

EDIT: I messaged the Krayt Clan official facebook group and they were VERY helpful! I can now pick all of their brains. 😀

Somewhere along the way I stumbled upon this tutorial, which was insanely helpful for me to understand how this is going to work. It made me think that yes, I can do this if I start with a good base.

At this point I’d sunk about 2-2.5 hours into this and finally settled on buying the $50 (3D printed parts only) version of this kit on etsy (link here). I want to buy my own vinyl and wrappings so that I can match it with other parts of my outfit:

Step 3: Thrifting

Her whole costume is worn and weathered. It’s a very different feel than the clean-and-perfect Imperial uniforms I’ve been playing with lately. Which means that you can pretty much get the fabric from anywhere. Seams don’t have to be perfect, piecing is period, and you can use as many remnants as you want. Fabrics don’t *have* to match, so you’re really free to use whatever you can find. Goodness knows that’s how the Tuskens tailor their outfits.

Boots: First thing that happened was a HUGE score on the boots. It’s like they were waiting for me! I’m going to use these as a base and wrap them in linen strips.

And only $10!

You can kind of see her boots in this shot – they’re the same color as all of the 501st CRLs on Tuskens:

Fabric:

I ended up buying 4 different knitted cardigans in various states of wear and stitch tightness:

I was particularly happy with these two, especially the loose knitted one:

I think one of the most important aspects of this costume is going to be varying up her textures. Her “hair” has to be different texture from her wrist wraps which is different from her skirt. Tatooine’s deserts don’t just manifest whole bolts of fabric after all — she’s pieced her outfit together from many different sources.

The cardigans will all be cut up (after being stay stitched) and used wherever they fit in the overall outfit.

Step 4: The Fabric Shop

I have a decent stash of just regular black fabric already (and a fair bit of solid red), so I wasn’t worried about pants, shirt, or cape base layer. In fact, I’m hoping I can just buy black pants and a black turtleneck and save myself that effort. So at this point, the shopping list was:

  1. her overskirt material (because it’s not textured like her cape and wrappings all are, so the cardigans won’t work here).
  2. leather/vinyl for the mask
  3. beads
  4. mask and boot wrappings
The haul

Skirt:

I really wanted a linen-ish fabric for her overskirt. Something rough woven, kind of stiff, and natural. I ended up with a linen look-alike (80% linen) that I got on sale:

You can see the two colors of vinyl I got also in the above photo. The darker one is very soft and was a whopping $34/yard (I only got 1/8th of a yard). It will be used on the inside of her mouthpiece. The lighter one is stiffer and will mimic the leather straps that go around her mouthpiece/nose and over the top of her eyes. It was cheaper at $10/yard. I got 1/4 yards.

Beads:

On one hand, I struck out on the beads. Yall, beads have gotten EXPENSIVE since I last looked at them! I figured I could just go to the kids’ section and get a tub of “whatever, I don’t care too much how shiny they are” wooden beads. In fact, there weren’t any in the kids’ section. I had to find the tiny wooden beads packets in the normal jewelry aisles, and then it was $20 for like, 100 pieces. Ouch.

On the other hand, I found these AMAZING charms which I’m including on her beaded apron (see above picture). My sw5e D&D game’s DM uses those spiral symbols as “wind” when we translate and talk with the Tusken Raiders in our current game. And Ms. Tusken Warrior has a circle of stamped metal on hers, and I couldn’t resist an inside joke, even at a sacrifice to screen accuracy:

I ended up ordering this pack on amazon. I will lay them out once they arrive to see if I’ll need a second package or not.

Cedilis 2000 Pcs Printed Wooden Beads

Mask and Boot Wrappings

EDIT: After getting access to the Krayt Clan forums, I’ve learned that the mask and boot wrappings should be done in duck cloth or bull denim. I’m going to use these pieces below elsewhere and go get 2 yards of tan duck cloth. It’s pretty cheap! And even better – they suggest dying it with black tea. I have a BUNCH of that at home already 😀

(Original Text): I found and ended up buying 1 yard each of two different ones: a sand colored (rayon crinkle?? I didn’t look, sorry!), and an offwhite linen look-alike (80% linen).

The color of the crinkle fabric is perfect, but I like the texture and look of the offwhite one better. So I got a package of “camel” colored RIT dye and a “dark brown” RIT dye and will play with it a little bit. Worst case scenario, I’ll pick one for the mask and one for the boots.

And that’s where we leave off today! I took the black pieces and threw them all in a hot wash just to see if I could ruin them even more before we start. I’m going to have to look up weathering techniques here too as we go along.

Hopefully tomorrow I’ll start on construction!